Organizing your freezer for meal prep is one of the smartest ways to save time, money, and reduce food waste. For many people, opening the freezer is like digging through a cold, crowded mystery box. You might find forgotten leftovers, bags of vegetables hiding in the back, or unidentifiable frozen lumps wrapped in foil.
When your freezer is cluttered, meal prep feels stressful and you risk tossing out good food. But with the right strategies, you can turn your freezer into a powerful tool that makes daily cooking fast and easy—even if you have a small space or a busy schedule.
Here you’ll learn step-by-step how to organize your freezer for meal prep, including what containers work best, how to label and date items, and clever systems to keep everything accessible. You’ll also discover practical tips most beginners miss, ways to avoid common mistakes, and simple habits to maintain your new freezer setup.
Why Freezer Organization Matters For Meal Prep
A well-organized freezer can change the way you cook. You’ll spend less time searching for ingredients, waste less food, and always have healthy meals ready to go. It’s especially helpful if you:
- Work long hours and want dinner ready fast
- Have a family and need to prep in advance
- Live in a small space and need to maximize storage
- Want to save money by buying in bulk and freezing
When your freezer is organized, you can quickly see what you have, plan meals around it, and make grocery shopping more efficient. According to the U.S. Department of Agriculture, Americans waste about 30–40% of the food supply every year, much of it due to poor storage and forgotten leftovers. Freezer organization is a simple step that helps reduce this waste.
Understanding Your Freezer Space
Before you start, take a close look at your freezer. Is it a top-freezer, bottom-freezer, side-by-side, or a chest freezer? The layout affects how you should organize and stack your meal prep. Here’s a quick comparison:
| Freezer Type | Pros | Cons |
|---|---|---|
| Top Freezer | Easy access, good for small families | Limited space, harder to stack large containers |
| Bottom Freezer | More room, pull-out drawers | Items can get buried at the bottom |
| Side-by-Side | Lots of shelves, easy to organize | Narrow shelves can limit container size |
| Chest Freezer | Huge capacity, great for bulk storage | Things often get lost at the bottom |
Knowing your freezer type will help you choose the right containers, stacking methods, and organization tools.
Step 1: Empty And Clean Your Freezer
Start by taking everything out. This is your chance to see what’s hiding, toss expired items, and wipe down surfaces. Place food in a cooler or insulated bag while you work.
- Throw away anything with freezer burn, strange smells, or that you can’t identify.
- Wipe shelves and drawers with warm, soapy water. Dry completely.
- Quickly check the freezer temperature. For best results, it should be at 0°F (-18°C) or lower.
This step is often skipped, but it’s essential. Cleaning not only gives you a fresh start but also helps prevent odors from transferring to your meal prep food.
Step 2: Sort And Group Similar Foods
Once your freezer is clean, sort your food into categories:
- Proteins: Chicken, beef, fish, tofu, cooked meats
- Vegetables and Fruits: Chopped, blanched, or ready-to-cook
- Prepared Meals: Soups, casseroles, stews, pasta dishes
- Breakfast Items: Muffins, waffles, smoothie packs
- Snacks and Sides: Frozen fries, dumplings, portioned rice
- Baking Supplies: Dough, nuts, shredded cheese
Grouping similar items together makes it easier to find what you need and avoid duplicates. For example, if you see three bags of frozen broccoli, you know you don’t need to buy more.
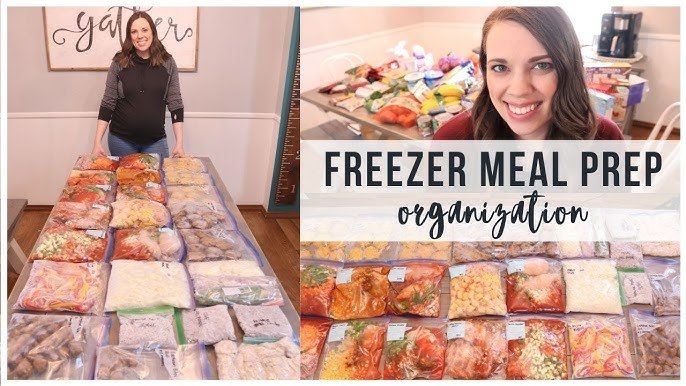
Credit: www.youtube.com
Step 3: Choose The Best Containers For Freezer Meal Prep
The right containers make a huge difference in keeping your freezer organized. Not all containers are created equal for freezing. Here’s a comparison of popular options:
| Container Type | Best For | Advantages | Drawbacks |
|---|---|---|---|
| Glass Containers | Soups, casseroles, leftovers | Reusable, don’t stain, microwave/oven safe | Heavy, take more space |
| Plastic Containers (BPA-free) | Portion meals, snacks | Lightweight, stackable | Can stain/warp, not all are freezer-safe |
| Freezer Bags | Veggies, fruits, marinated meats | Flexible, save space, good for flat freezing | Single-use (if not careful), can puncture |
| Vacuum-Sealed Bags | Long-term storage, bulk meats | Best for preventing freezer burn, compact | Need special equipment |
| Aluminum Foil Pans | Lasagna, enchiladas, baked meals | Oven-ready, disposable | Not eco-friendly, can bend |
For best results, use a mix. Stackable containers save space, while freezer bags let you freeze things flat—perfect for soups or stews. Always choose freezer-safe options to prevent cracking or freezer burn.
Step 4: Label And Date Everything
Even if you think you’ll remember what’s inside, always use labels. Write the name of the food and the date you froze it using a permanent marker or freezer labels. This prevents mystery meals and helps you use older food first.
- Write clear, large text so you can see it at a glance.
- Place labels on the front or lid of containers.
- For freezer bags, write on the top edge before filling.
Pro tip: Use color-coded labels or washi tape for different food types (e.g., red for meats, green for veggies). This simple system makes meal prep faster and keeps you organized.

Credit: cleanmama.com
Step 5: Use The First In, First Out (fifo) Method
The FIFO method helps you use older food before newer items. Place newly prepared meals behind or under older ones. This way, you naturally reach for items that have been in the freezer longer.
Many people forget this step and end up with old food buried in the back. With FIFO, you reduce waste and keep your meal prep rotation fresh.
Step 6: Maximize Space With Smart Packing
To fit more meal prep in your freezer, use these space-saving tricks:
- Freeze flat: Lay soups, sauces, and chopped veggies flat in freezer bags. Once frozen, stand them up like files.
- Stack similar shapes: Use square or rectangular containers. They fit together better than round ones.
- Fill gaps: Tuck smaller bags or boxes into spaces around larger items.
- Use bins or baskets: Group bags or small items in stackable bins. Label each bin by category.
Here’s an example of how much space you can save by freezing food flat:
| Storage Method | Average Number of Meals per Shelf | Ease of Access |
|---|---|---|
| Flat Freezer Bags | 10-15 | Very easy (stand up like files) |
| Round Containers | 5-7 | Harder (don’t stack well) |
| Mixed Containers | 7-10 | Medium |
Step 7: Create Zones In Your Freezer
Dividing your freezer into zones makes finding food fast and keeps meal prep running smoothly. Assign each shelf or drawer a purpose, such as:
- Top shelf: Ready-to-eat meals
- Middle shelf: Proteins
- Bottom shelf: Vegetables and fruits
- Door: Breakfast items and snacks
If you have a chest freezer, use stackable bins or baskets. Label each zone for easy access. This system makes it easy for anyone in your household to find or put away food without mixing up categories.
Step 8: Keep An Inventory
One big mistake people make is forgetting what’s in the freezer. Keep a simple inventory list on the freezer door or in a nearby notebook. Update it every time you add or remove something.
Include:
- Name of the meal/ingredient
- Quantity (e.g., 2 bags, 1 tray)
- Date frozen
- Expiry date (if needed)
You can also use a smartphone app to track freezer inventory. This step prevents double-buying, forgotten meals, and saves money.
Step 9: Know How Long Foods Last In The Freezer
Not all foods last the same amount of time when frozen. Here’s a quick guide:
- Cooked meals: 2–3 months
- Raw meats: 4–12 months (depending on type)
- Fruits/vegetables: 8–12 months
- Bread and baked goods: 2–3 months
- Dairy (cheese, butter): 6–9 months
Keeping this in mind helps you plan your meal prep and avoid eating food past its best quality. For more detailed information, check the U.S. Food Safety Guidelines.
Step 10: Reheat And Thaw Safely
Safe thawing is just as important as safe freezing. Always thaw meal prep food in the refrigerator overnight, in cold water (sealed bag), or in the microwave. Never thaw at room temperature, as this can let bacteria grow.
- Microwave: Quickest, but watch for uneven heating
- Refrigerator: Safest, but needs more time
- Cold water: Fast, but requires more attention
Some foods (like soups or casseroles) can go straight from freezer to oven or stovetop. Make sure containers are oven-safe if using this method.
Two Insights Beginners Often Miss
- Don’t Overfill Your Freezer: A full freezer runs more efficiently, but overpacking blocks airflow. Leave a little space between items so cold air can circulate. This keeps food frozen evenly and prevents freezer burn.
- Pre-Portion Before Freezing: Instead of freezing one large batch, divide meals into single or family-size portions. This makes thawing and reheating easier—and you only take out what you need.
Smart Habits To Maintain Your Organized Freezer
- Spend five minutes each week tidying up and updating your inventory.
- Always label new items before freezing.
- Place new meals behind older ones for FIFO rotation.
- Defrost your freezer once or twice a year to prevent ice buildup and reclaim space.
With regular upkeep, your organized freezer becomes a long-term meal prep asset.
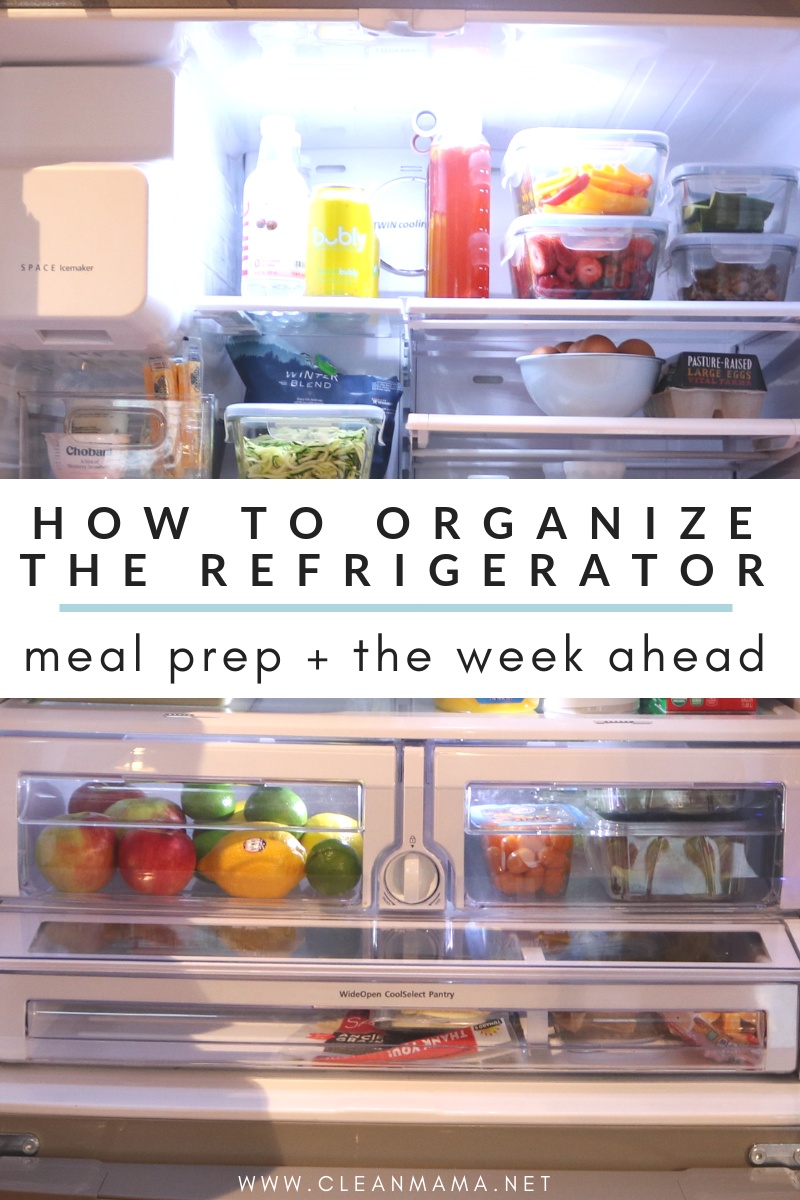
Credit: cleanmama.com
Frequently Asked Questions
How Often Should I Clean Out My Freezer?
Aim to clean your freezer at least twice a year. Remove all food, wipe surfaces, and toss anything expired. A quick monthly check to remove old or unwanted items also helps prevent clutter.
What Should I Do If I Lose Power And Food Starts To Thaw?
Keep the freezer door closed as much as possible. A full freezer can hold its temperature for about 48 hours if unopened. If food has thawed but is still cold (below 40°F/4°C), it’s usually safe to refreeze, but quality may suffer.
Can I Freeze Glass Containers Safely?
Yes, but use only freezer-safe glass (like tempered glass). Leave space at the top for food to expand and avoid sudden temperature changes to prevent cracking.
Why Do Some Foods Get Freezer Burn, And How Can I Prevent It?
Freezer burn happens when air reaches the food’s surface and dries it out. Prevent this by using airtight containers or vacuum sealing, and always remove as much air as possible from bags before freezing.
What’s The Best Way To Organize A Chest Freezer For Meal Prep?
Use stackable bins or baskets to create layers. Keep an inventory sheet handy. Place frequently used items on top, and group similar foods together so you don’t have to dig deep every time.
Organizing your freezer for meal prep takes a little effort, but the rewards are huge. You’ll save time, cut waste, and enjoy homemade meals anytime. With these steps, your freezer can become one of your most valuable kitchen tools.
