Labeling and dating food storage containers might sound simple, but doing it right saves time, money, and keeps your food safe. Many people open their fridge or pantry and wonder, “Is this still good? ” or “When did I make this soup?
” If you label and date your containers, you always know what’s inside and how long it’s been there. Mistakes can lead to wasted food or even food poisoning. So, learning this small skill makes a big difference in your kitchen.
Let’s walk through what you need, the best methods, and a few tricks that most beginners overlook. You’ll find step-by-step instructions, practical tips, and real examples. By the end, you’ll never worry about mystery leftovers again.
Why Label And Date Food Storage Containers?
Labeling and dating food storage containers is more than just a neat habit. It helps you avoid food waste, saves money, and keeps your family safe. Food stored too long can grow bacteria even if it looks okay. By using clear labels, you know exactly what you have and when you made it. This leads to better meal planning and less confusion.
There’s also a big time benefit. Instead of opening every container, you can see what’s inside at a glance. This is especially useful if you have a busy family, share a fridge with roommates, or cook in bulk. Proper labeling is also essential in food businesses to meet safety standards.
What You Need To Get Started
Before you begin, gather a few simple supplies. You don’t need anything fancy, but using the right tools makes the process faster and keeps labels clear.
- Labels: You can use sticker labels, masking tape, or freezer tape. Look for ones that stick well in cold or moist conditions.
- Permanent Marker: A fine-tip marker works best for clear writing. Water-based markers will smudge.
- Clean Containers: Plastic, glass, or reusable bags all work, but make sure they’re dry and clean before labeling.
- Optional: Label maker machines for a more organized look, especially for long-term pantry storage.
Many beginners use regular pens or sticky notes, but these often fade, fall off, or smear. Permanent markers and proper tape save you from guessing later.
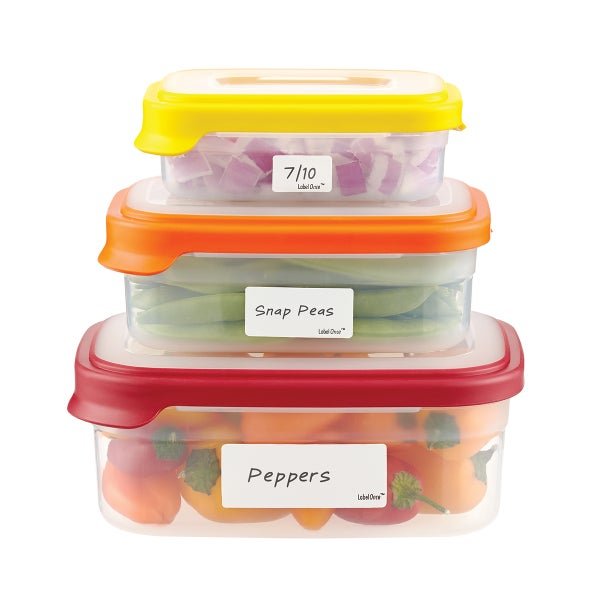
Credit: www.containerstore.com
How To Label Food Storage Containers: Step-by-step
Let’s break down the process so you can label containers like a pro.
Step 1: Choose The Right Label
Use labels that fit your storage situation. For the fridge, masking tape and freezer tape work well because they stick in cold and humid conditions. For the freezer, always use freezer-safe labels; regular tape can peel off in the cold.
Step 2: Write Clearly
Use a permanent marker to write the food name and the date. Avoid abbreviations that others might not understand. For example, instead of “Ck S,” write “Chicken Soup.”
Step 3: Place The Label Correctly
Stick the label on the side of the container facing outward. For bags, put the label on the smooth area. Avoid placing labels on the lid unless the container stacks, because the lid might get swapped with another container.
Step 4: Include Key Information
Always include:
- Food name
- Date prepared or stored
- (Optional) Expiration or “use by” date
Some people add extra details, like allergens or portion sizes, if needed.
Step 5: Store Properly
After labeling, place the container in the fridge or freezer with the label visible. This helps you check dates quickly and rotate older items to the front.
What Information Should You Write?
Being specific helps everyone who uses your kitchen. Here’s what to include:
- Food name: Be clear and avoid confusion (“Spaghetti Sauce” not just “Sauce”).
- Date cooked or stored: Use day/month/year or month/day/year, but be consistent.
- Expiration date: If you know the shelf life, add a “use by” date.
- Other details: Allergens, “contains nuts,” or “gluten-free” for shared kitchens.
Example:
“vegetable Curry | 21/06/2024 | Use By 25/06/2024”
Types Of Labels For Different Needs
Different storage needs require different types of labels. Here’s a quick comparison:
| Label Type | Best For | Pros | Cons |
|---|---|---|---|
| Masking Tape | Fridge & Short-Term | Cheap, easy to remove | May peel in freezer |
| Freezer Tape | Freezer & Long-Term | Sticks well in cold, moisture-resistant | More expensive |
| Sticker Labels | Pantry & Jars | Neat, easy to write on | Some may not remove cleanly |
| Label Maker | Long-Term & Bulk Storage | Professional look, durable | Costly, needs device |
Choose the type that fits your style and budget. For most home cooks, masking tape or sticker labels work fine.
Best Practices For Labeling And Dating
A few practical tips can help you avoid common mistakes:
- Label Before Filling: Write and stick the label on the container before adding food. This keeps the surface clean and dry.
- Use Large, Clear Letters: Make sure anyone can read the label, even in a hurry.
- Standardize Your Format: Choose a date format (like DD/MM/YY) and use it every time to avoid confusion.
- Color Coding: Use different color markers or labels for food types—red for meats, green for vegetables, blue for dairy.
- Remove Old Labels: Before reusing containers, take off the old label to avoid mixing up dates.
Non-obvious insight: If you freeze a lot of food, label the number of servings as well (“2 portions chili”), so you know how much to defrost.
How Long Can You Store Different Foods?
Labeling is only half the job. You should also know how long different foods stay safe in the fridge or freezer. Here’s a quick reference:
| Food Type | Fridge (Days) | Freezer (Months) |
|---|---|---|
| Cooked Meat | 3–4 | 2–6 |
| Soups/Stews | 3–4 | 2–3 |
| Bread | 7 | 1–3 |
| Dairy | 7–10 | 1 |
| Raw Vegetables | 5–7 | 8–12 |
Use this table to choose the right “use by” date for your labels.
Labeling For Special Situations
Shared Kitchens
If you share a kitchen with roommates or coworkers, clear labeling avoids confusion. Include your name or initials on the label (“Anna – Veggie Curry – 22/06/24”). This prevents accidental eating or waste.
Food Allergies
For families with allergies, add warning notes on the label. For example, “Contains peanuts” or “Gluten-free. ” This is crucial in group or school settings.
Batch Cooking And Meal Prep
If you cook meals for the week, label each container with the meal name and date. For example, “Lunch – Chicken Rice – 19/06/24. ” This helps you quickly grab the right meal and stick to your plan.
Non-obvious insight: For meal preppers, numbering meals (“Lunch 1,” “Lunch 2”) helps track your meal order and rotation.
Mistakes To Avoid When Labeling
Beginners often make a few common mistakes when labeling and dating food storage containers. Here’s how to avoid them:
- Using water-soluble ink: These smudge and fade in the fridge or freezer, making labels unreadable.
- Labeling the lid only: Lids can be switched between containers, making it easy to mix up contents and dates.
- Forgetting to update labels: When you add new food to a container, always update the label. Old dates can lead to eating spoiled food.
- Unclear food names: “Sauce” or “Soup” is too general—be specific so everyone knows what’s inside.
- Not removing old labels: Old labels cause confusion and crowd containers.
Using Technology: Digital Tracking
Some people use apps or spreadsheets to track food storage. You can scan your labeled containers and log the information. This is useful if you have a large freezer or pantry. Apps can alert you before food expires, reducing waste.
However, for most home cooks, simple written labels are enough.
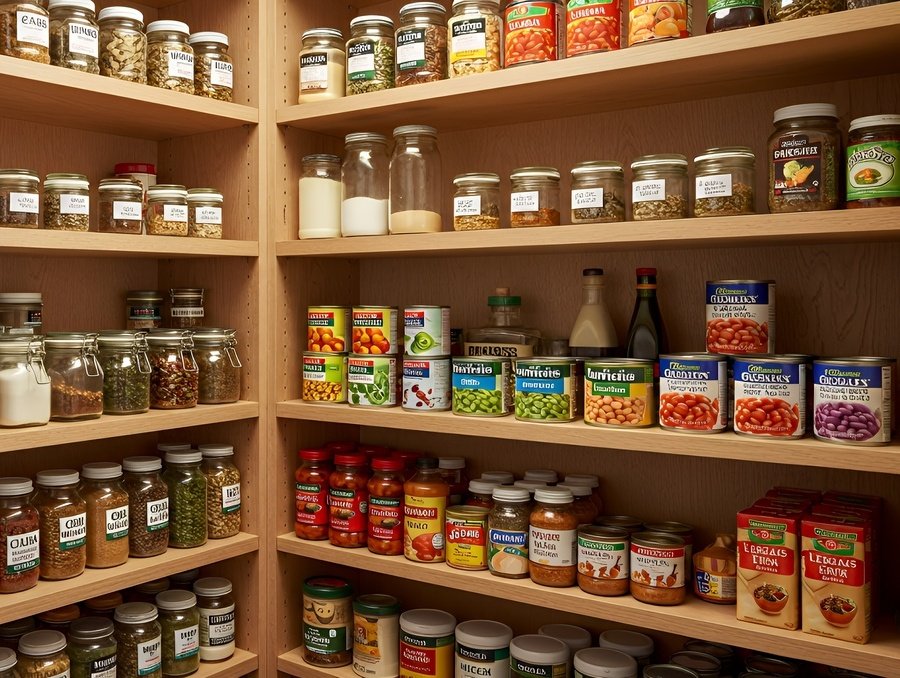
Credit: www.unr.edu
Labeling For Bulk Storage And Pantry Organization
For large bags of flour, rice, or beans, use large, clear labels. Include the purchase date, and if you transfer from the original packaging, copy the expiration date too.
Example:
“white Rice | Bought 12/06/2024 | Exp 12/06/2026”
This helps track freshness and rotate your pantry items.
Cleaning And Reusing Containers
Before relabeling, wash containers well and remove the old label. Sticky residue can attract dirt and bacteria. For stubborn glue, try rubbing alcohol or a bit of cooking oil. If you use reusable silicone bags, label with a dry-erase marker or a removable sticker.
Real-life Example: Home Kitchen
Sarah cooks meals for her family every Sunday. She uses glass containers with freezer tape, writes the meal name and date, and stores them with the labels facing out. She adds “contains dairy” for her husband’s allergy. Before shopping, she checks labels to see what’s left and plans her meals.
This system saves her time, money, and stress during the week.
Real-life Example: Food Business
In a small café, staff use a label maker for all prepared foods. Every item has the product name, prep date, and use-by date. Staff are trained to “first in, first out,” using older items before newer ones. This system passes health inspections and keeps customers safe.
Food Safety Standards
In commercial kitchens, labeling is required by food safety laws. For example, the U.S. FDA recommends labeling all prepared foods with the date and time. Even at home, following these rules keeps your food safe. For more on food storage safety, see the USDA’s guidance.
Frequently Asked Questions
How Long Should I Keep Leftovers In The Fridge?
Most leftovers are safe for 3–4 days in the fridge. After that, bacteria can grow even if the food looks fine. Always check the type of food and use your labels to decide.
What Is The Best Way To Remove Old Labels From Containers?
Soak the container in warm, soapy water to loosen paper labels. For sticky residue, use rubbing alcohol or a small amount of cooking oil. Dry well before relabeling.
Can I Use Dry-erase Markers On Containers?
Yes, you can use dry-erase markers on glass or some plastic containers, but the writing may rub off in the fridge or freezer. For long-term storage, use permanent labels.
Is It Safe To Reuse Food Storage Labels?
It’s best to use new labels each time you store new food. Old labels can lead to confusion and may not stick well after washing.
What Should I Do If I Forget To Label Something?
If you forget to label a container and can’t remember when you stored it, it’s safest to throw it out. Don’t taste food to check freshness.
Labeling and dating your food storage containers may seem small, but it brings big results. You’ll save money, reduce waste, and avoid food safety problems. A few minutes of labeling makes your kitchen more organized and helps you feel in control.
Start with simple labels and a permanent marker, and see the difference in your daily routine.

Credit: www.containerstore.com
