Changing the brightness of a room can completely change its feel. That’s why many homeowners want dimmer switches—they let you control how much light you want, save energy, and extend bulb life. But for beginners, installing a dimmer switch can seem confusing, or even risky. This step-by-step guide makes it simple and safe for anyone ready to try.
You’ll learn what tools you need, how to pick the right dimmer, how to install it, and how to avoid common mistakes. Even if you have never touched electrical wiring before, this guide will help you handle the job with confidence.
Let’s make your home’s lighting more comfortable and flexible.
Why Install A Dimmer Switch?
A dimmer switch does more than just lower the lights. It offers several benefits that make your home smarter and more comfortable.
- Energy Savings: Lowering the brightness means less electricity use, which can cut your power bill by up to 20%. Over time, this adds up.
- Longer Bulb Life: Bulbs last longer when not always running at full power. You’ll buy fewer replacements.
- Better Mood and Comfort: Dim lights for a movie, brighten them for reading, or find any balance you like.
- Home Value: Modern lighting controls can make your home more appealing to buyers.
- Safety at Night: Soft night-time lighting helps prevent accidents without disturbing sleep.
Many people miss that not all bulbs work with all dimmers. Make sure your bulbs are dimmable—especially if you use LED or CFL types.
Types Of Dimmer Switches
Choosing the right dimmer is key. They come in different styles and work with different bulbs. Here’s a quick overview:
| Dimmer Type | Best For | Notes |
|---|---|---|
| Rotary (Dial) | Simple control, traditional homes | Turn knob to adjust |
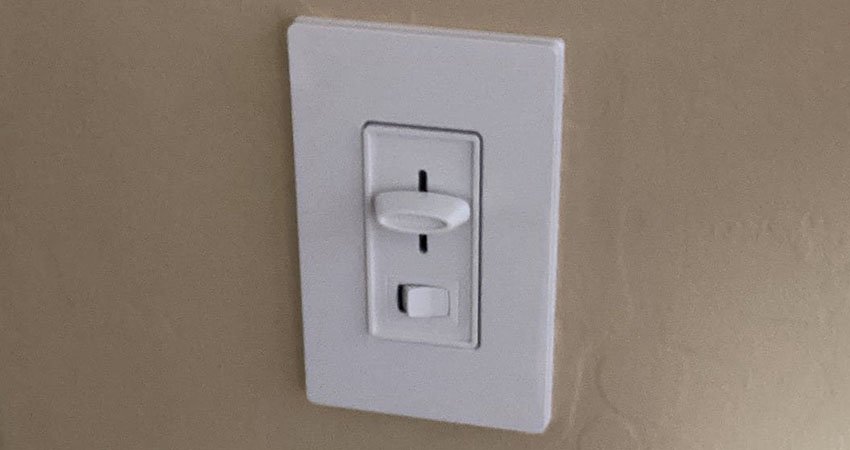
| Slide | Modern look, easy use | Slide bar up/down for brightness |
| Touch | High-tech homes | Touch pad or screen |
| Smart Dimmer | Home automation, remote use | Control with phone or voice |
| Toggle | Matches standard switches | Switch flips with dimming feature |
But the style isn’t all that matters. Dimmer switches must match the bulb type and your wiring setup.
Matching Dimmer To Bulb Type
Not all dimmers work with every bulb. Check this guide:
| Bulb Type | Works With Standard Dimmer? | Needs Special Dimmer? |
|---|---|---|
| Incandescent | Yes | No |
| Halogen | Yes | No |
| LED | No | Yes (LED-compatible) |
| CFL | No | Yes (CFL-compatible) |
A common mistake: Using a standard dimmer with LED bulbs. This can cause flickering or buzzing. Always check both your bulbs and your new dimmer for compatibility.
Tools And Materials Needed
Gather these items before you start. Having everything ready saves time and stress.
- New dimmer switch (check compatibility)
- Screwdriver (flat and Phillips)
- Wire stripper/cutter
- Voltage tester
- Electrical tape
- Wire nuts (usually included with new switch)
- Needle-nose pliers
- Flashlight (if you’re working in a dark area)
- Wall plate (sometimes included)
- Safety gloves and glasses
Pro tip: Don’t use a knife to strip wires—it’s unsafe and can damage the copper.
Safety First: Preparing For Installation
Electricity is dangerous if not handled correctly. Follow these steps before touching any wires.
- Turn Off Power: Go to your home’s breaker box. Turn off the breaker for the room or circuit you’ll be working on. Never trust the wall switch alone.
- Double-Check Power: Use a voltage tester on the switch wires to be sure the power is off.
- Warn Others: Tell family not to turn the breaker back on until you’re done.
- Keep Area Dry and Clear: Water and clutter increase risk.
- Wear Safety Gear: Gloves and glasses protect you from shocks and sparks.
Even skilled electricians double-check the power. Never skip this step.
:strip_icc()/BHG-home-improvement-electrical-guide-to-light-switches-and-dimmers-hero_31187-e8349e7ac5f84023ab572db07231401a.jpg)
Credit: www.bhg.com
Step-by-step Dimmer Switch Installation
Ready to get hands-on? Here’s how to install your new dimmer switch safely and correctly.
1. Remove The Old Switch
- Use a screwdriver to take off the wall plate.
- Remove the screws holding the switch to the box.
- Gently pull the switch out. Don’t yank the wires.
2. Identify The Wires
Typical wall switches have:
- Black (hot): Brings power in
- Black or red (load): Sends power to the light
- Green or bare copper (ground): For safety
- White (neutral): Sometimes present, not always used
Take a photo before disconnecting, so you know how the wires were connected.
3. Disconnect The Old Switch
- Loosen the screws or remove the wire nuts.
- Detach the wires from the old switch.
- Straighten the wire ends with pliers if needed.
4. Connect The Dimmer Switch
Most dimmer switches have three wires:
- Black (hot)
- Black or red (load)
- Green or bare (ground)
Match the wires from the wall to the dimmer:
- Use wire nuts to connect black to black, and so on.
- Twist each wire pair together, then screw on the nut tightly.
- Wrap with electrical tape for extra safety.
Some dimmers (especially smart ones) may require a neutral wire. If your wall box doesn’t have one, choose a dimmer that doesn’t need it.
5. Secure The Dimmer In The Box
- Carefully tuck the wires back into the box.
- Align the dimmer switch and screw it into place.
- Attach the new wall plate.
6. Restore Power And Test
- Turn the breaker back on.
- Test the dimmer: Slide or rotate it and check if the light changes brightness smoothly.
- If nothing happens, turn off the breaker and double-check your wiring.
7. Troubleshooting Common Problems
- Light flickers: Bulb and dimmer are not compatible. Use a dimmable bulb that matches your switch.
- Switch gets hot: Check the wattage rating. Don’t connect too many lights.
- No response: Make sure all wire connections are tight and correct.
Special Cases: Three-way Dimmers
Some lights are controlled by two switches (like at both ends of a hallway). This is called a three-way switch setup.
Three-way dimmers have four wires:
- Two “traveler” wires
- One common (hot)
- One ground
When replacing one switch with a dimmer, buy a three-way dimmer. Follow the instructions in the package—they usually include a wiring diagram. Mark the common wire with tape to avoid mistakes.
Many beginners try to install a regular dimmer in a three-way setup and find that the switches don’t work right. Always check your wiring first.
Cost And Time Estimate
Installing a dimmer switch is affordable and fast:
- Dimmer switch cost: $10 to $50+ (smart models cost more)
- Tools: Most are common household items
- Time: 20–40 minutes (for a single switch)
Hiring an electrician can cost $80–$150 per switch. Doing it yourself saves money and gives you new skills.
Dimmer Switch And Light Bulb Compatibility
One of the biggest sources of trouble is bulb compatibility. Not all dimmable bulbs work perfectly with every dimmer. Even some dimmable LEDs can flicker or buzz if the dimmer is old or not rated for LEDs.
Tips for best results:
- Buy bulbs and dimmers from the same brand when possible.
- Read the packaging for “LED compatible” or “CFL compatible.”
- Test before installing many bulbs—try one first.
Here’s a quick reference:
| Bulb Type | Best Dimmer Type | Notes |
|---|---|---|
| Incandescent/Halogen | Standard rotary/slide | Wide dimming range |
| LED | LED-compatible dimmer | Prevents flicker/buzz |
| CFL | CFL-compatible dimmer | Limited dimming range |
A non-obvious tip: Some “dimmable” LEDs only dim down to 20% of full brightness, not all the way to zero. Test before buying many.
Smart Dimmer Switches: What To Know
Smart dimmers let you control lights with your phone or voice assistant (like Alexa or Google Home). They add convenience but need Wi-Fi and sometimes a neutral wire.
Before buying, check:
- Wi-Fi strength at the switch location
- If your home has a neutral wire (common in newer homes)
- Compatibility with your bulbs
Smart dimmers are great for routines and remote control but take longer to set up than basic models.
Safety And Legal Tips
- Always follow local electrical codes. Some areas require permits for electrical work.
- If you feel unsure, hire a licensed electrician.
- Never work on live wires—always double-check the power is off.
- Dispose of old switches safely, especially if they contain mercury (rare but possible in older dimmers).
Credit: www.iotics.io
When To Call A Professional
DIY is rewarding, but some jobs are best left to experts. Call an electrician if:
- You find aluminum wiring (common before 1970)
- The wiring looks damaged or burnt
- You’re unsure about the wiring setup
- The switch is part of a complex multi-way circuit
Your safety is always worth more than saving a few dollars.
Maintenance And Troubleshooting Tips
Dimmer switches need little care, but here’s how to keep them working well:
- Clean the wall plate with a dry cloth—avoid water.
- If the switch feels hot, remove some bulbs or upgrade the dimmer.
- Buzzing or flickering lights? Try a different brand bulb or check for loose wires.
Dimmer switches are reliable, but sometimes a simple bulb change fixes problems.
Upgrading Multiple Switches At Once
If you want dimmers in several rooms, plan ahead:
- Buy all dimmers and bulbs at the same time for matching style and compatibility.
- Label wires as you go, so you don’t mix up connections.
- Do one switch at a time, especially if you’re new.
Installing several at once can save time, but only if you’re careful.
Final Thoughts
Installing a dimmer switch is one of the easiest and most effective ways to improve your home’s comfort and value. With basic tools, a little time, and careful attention to safety, you can control your lighting exactly how you want. Remember to check compatibility between your dimmer and bulbs, follow each step, and never rush electrical work. If you ever feel unsure, ask a professional for help.
For more details about wiring and safety codes, see the Family Handyman Dimmer Switch Guide.
Credit: georgebrazilplumbingelectrical.com
Frequently Asked Questions
How Do I Know If My Bulbs Are Dimmable?
Check the bulb packaging or the bulb itself. It will say “dimmable” or show a dimmer icon. Not all LEDs and CFLs are dimmable, so look closely.
Can I Install A Dimmer Switch If I Have Only Two Wires In My Wall Box?
Yes, many basic dimmers work with just two wires (no neutral). But smart dimmers often need a neutral wire. Check the requirements before buying.
Why Does My Light Flicker Or Buzz After Installing A Dimmer?
This usually means the bulb and dimmer are not compatible. Try a different dimmable bulb or buy a dimmer designed for your bulb type.
Is It Safe To Install A Dimmer Myself?
If you follow all safety steps, turn off the power, and check your wiring, it’s safe for most homeowners. If you are unsure, call a licensed electrician.
How Many Lights Can I Connect To One Dimmer Switch?
Each dimmer has a maximum wattage rating (e. g. , 600W). Add up the watts of all bulbs you want to control and make sure it’s less than the dimmer’s rating. For example, a 600W dimmer can handle ten 60W bulbs, or more LEDs (which use less power).
