Setting up a docking station at home can transform your workspace. With a good docking station, you can use multiple monitors, charge your devices, and keep your desk tidy. But for many people, the idea of setting up a docking station feels confusing.
Wires, compatibility, and device choices can be overwhelming. The good news? With the right steps, you can build a smooth, efficient setup that makes your work or study life easier and more productive. This guide will walk you through everything you need to know, from choosing the right equipment to troubleshooting common issues, all explained in simple language.
Why Set Up A Docking Station?
A docking station acts as a bridge between your laptop and all your devices. It lets you connect a monitor, keyboard, mouse, printer, and more, using just one cable from your laptop. This makes it much easier to switch between working at your desk and taking your laptop on the go.
Many people set up docking stations for these reasons:
- More comfortable workspace: Use a bigger monitor, a proper keyboard, and a mouse.
- Less cable clutter: Just one connection to your laptop.
- Faster device switching: Move your laptop with one plug, not many.
- Charge devices: Many docking stations also provide power.
Choosing The Right Docking Station
Not all docking stations work the same way. Choosing the right one is important for a smooth setup.
Key Factors To Consider
- Compatibility with your laptop: Check your laptop’s ports. Common types are USB-C, Thunderbolt 3/4, and USB 3.0. Some brands (like Dell or HP) have special docks for their laptops.
- Number and type of ports: Think about what you need to connect—monitor, keyboard, mouse, speakers, Ethernet, SD card, etc.
- Display support: If you want to use two monitors, make sure the dock supports this. Check the maximum resolution (like 4K or 1080p).
- Power delivery (charging): Some docks can charge your laptop while connected. Make sure the power output matches your laptop’s needs.
- Budget and brand: Well-known brands like Anker, CalDigit, Dell, and HP often have better support and reliability.
Comparing Docking Station Types
Here’s a quick comparison of common docking station types:
| Type | Main Connection | Typical Features | Best For |
|---|---|---|---|
| USB-C Dock | USB-C | Single/dual display, power delivery, USB ports | Modern laptops, simple setups |
| Thunderbolt Dock | Thunderbolt 3/4 | High speed, multiple 4K displays, charging | High-end laptops, power users |
| Brand-Specific Dock | Proprietary (e.g., Dell, HP) | Best compatibility, all-in-one solutions | Matching brand laptops |
| USB 3.0 Dock | USB-A | Basic display, peripherals, no charging | Older laptops |
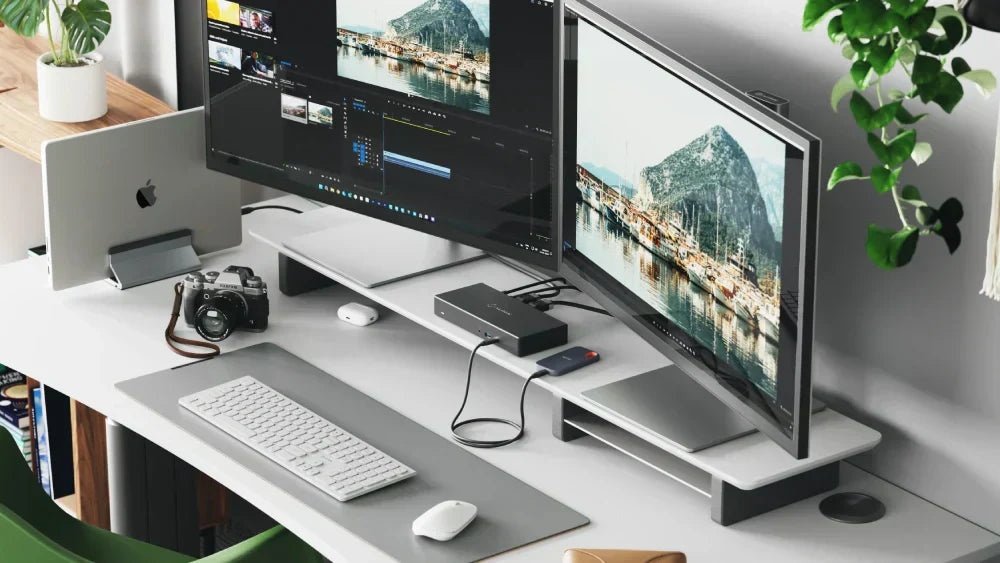
Non-obvious insight: Some docking stations only work at full speed with certain laptop models. Always check your laptop’s specs for “DisplayPort Alt Mode” or Thunderbolt support.
Credit: us.targus.com
Essential Equipment For Your Setup
Before you start, gather these items:
- Docking station (compatible with your laptop)
- Power adapter (for the dock, if needed)
- Cables: HDMI, DisplayPort, USB, Ethernet, depending on your devices
- Monitor(s)
- Keyboard and mouse (wired or wireless)
- Speakers/headphones
- External drives/printer (optional)
Example Setup
Imagine you have a USB-C laptop. A simple setup might look like:
- USB-C dock
- Two monitors (HDMI and DisplayPort)
- Wireless keyboard and mouse
- Phone charging cable
- Ethernet cable for internet
Setting Up The Docking Station: Step-by-step
Follow these steps to set up your docking station at home:
1. Choose The Right Location
Pick a spot on your desk where the dock is easy to reach but doesn’t get in the way. Keep it near your monitor and power outlet.
2. Connect The Dock To Power
If your docking station comes with its own power adapter, plug it in first. Some smaller docks use your laptop’s power, but larger ones need their own supply.
3. Attach Monitors
Connect your monitor(s) to the dock using the correct cables. Most docks support HDMI or DisplayPort. Make sure the cables are secure.
Example: If your dock has two HDMI ports and your monitors support HDMI, use HDMI cables for both.
4. Connect Peripherals
Plug your keyboard, mouse, speakers, and any other devices into the dock’s USB ports. For wireless devices, plug the receiver dongle into the dock.
5. Add Network And Audio
If you want fast internet, connect an Ethernet cable from your router to the dock. For better sound, plug in speakers or headphones.
6. Connect Your Laptop
Now, plug the dock’s main cable (usually USB-C or Thunderbolt) into your laptop. Your laptop should recognize the dock and connected devices.
Non-obvious insight: Some docks require installing drivers or software. Visit the dock manufacturer’s website for the latest downloads.
7. Power On And Test
Turn on your laptop and monitors. Check that all devices work—keyboard, mouse, internet, sound, and displays. If something isn’t working, try unplugging and reconnecting the cable, or restarting your laptop.
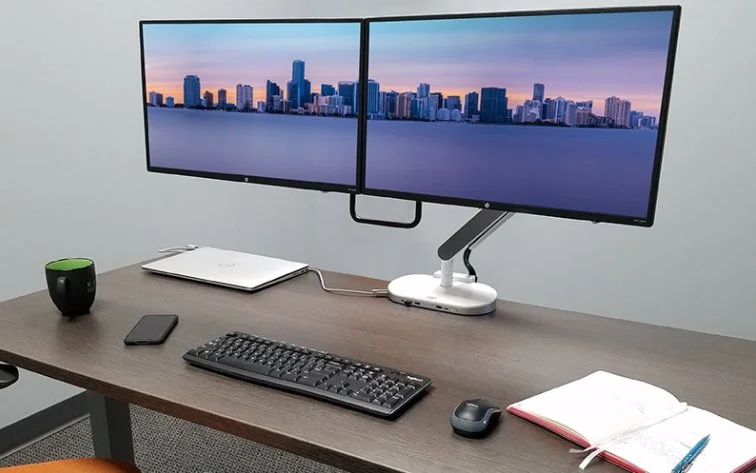
Credit: www.technologydeskingtradingdesks.com
Optimizing Your Workspace
A good docking setup is more than just plugging in cables. Here are ways to make your workspace even better:
Monitor Arrangement
Arrange your monitors so you can work comfortably. Most operating systems let you choose which monitor is “main” and how the screens are placed.
- In Windows: Right-click the desktop > Display settings.
- In Mac: System Preferences > Displays.
Cable Management
Messy cables can make your desk look untidy. Use these tips:
- Use cable clips or ties to keep wires together.
- Place the dock near the back of the desk to hide cables.
- Get a wireless keyboard and mouse to cut down on wires.
Ergonomic Tips
Set your monitor at eye level to avoid neck strain. Keep your keyboard and mouse close to your body. Use a comfortable chair.
Example Monitor Setup
| Setup Type | Number of Monitors | Best Use Case |
|---|---|---|
| Single Monitor | 1 | Basic office work, students |
| Dual Monitor | 2 | Multitasking, programming, finance |
| Triple Monitor | 3 | Designers, video editing, trading |
Troubleshooting Common Problems
Even with a good setup, you might face issues. Here’s how to solve the most common problems:
1. Monitors Not Detected
- Check that cables are fully plugged in.
- Make sure your dock supports the number of monitors you want.
- Update your graphics drivers and dock firmware.
- Try restarting your laptop.
2. Devices Not Working
- Unplug and reconnect the device.
- Try a different USB port.
- Check if the dock needs special drivers from the manufacturer.
3. No Charging
- Not all docks provide power. Check your dock’s specs for “Power Delivery.”
- Use the dock’s official power adapter if it has one.
4. Slow Internet
- Use an Ethernet cable for best speed.
- If using Wi-Fi, make sure your laptop is not too far from the router.
5. Laptop Gets Hot
- Some docks can make laptops warmer, especially if charging and running many devices.
- Keep your laptop on a flat, hard surface.
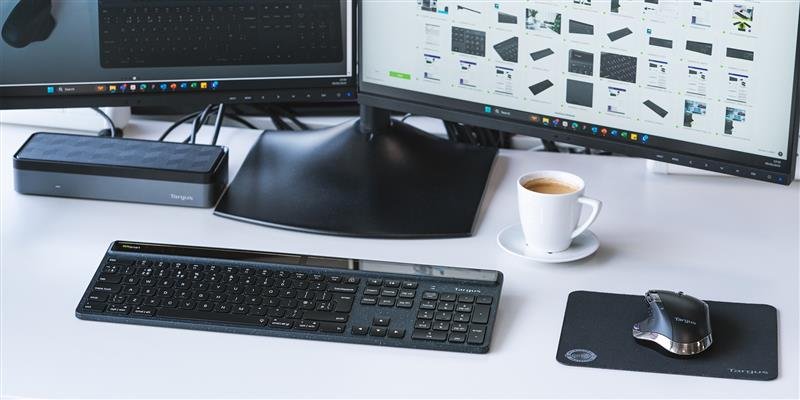
Non-obvious tip: If your dock uses “DisplayLink” technology for extra displays, you may need to install DisplayLink drivers for everything to work smoothly.

Credit: us.targus.com
Advanced Tips For A Better Setup
After your basic setup is working, you can add more features:
Using Multiple Laptops
Some docking stations let you connect more than one laptop. This is useful if you use both a work and personal laptop. Just unplug the main cable and switch it to the other laptop.
Adding More Monitors
If your dock supports only one or two monitors but you want more, look for docks with “daisy-chaining” (DisplayPort Multi-Stream Transport) or use a USB to HDMI adapter.
Usb Hubs And Expansion
If you need more USB ports than your dock provides, you can plug a USB hub into the dock.
Secure Your Devices
If you work in a shared space, use a dock with a Kensington lock slot to physically secure it.
Real-world Example: Home Office Setup
Let’s look at a real home office example:
Sam works from home and uses a Dell XPS laptop. He wants two 24-inch monitors, a wireless keyboard and mouse, wired internet, and charging from the dock.
Sam chooses a Thunderbolt 3 dock that supports dual 1080p monitors and delivers 90W charging. He connects both monitors (one HDMI, one DisplayPort), plugs in his wireless dongle, adds an Ethernet cable, and uses the dock’s power adapter. Now, he only needs one cable to connect everything, and his desk stays neat.
Comparison: Docking Station Vs. Simple Usb Hub
Many people wonder if they should use a docking station or just a USB hub. Here’s a simple comparison:
| Feature | Docking Station | USB Hub |
|---|---|---|
| Monitor Support | Yes (multiple, high-res) | No or limited |
| Laptop Charging | Yes (most models) | No |
| Ethernet | Yes | No/rare |
| Audio Out | Yes | No |
| Best For | Full desktop experience | Basic USB needs |
Takeaway: If you only need extra USB ports, a hub is fine. For a full desktop setup, a docking station is much better.
Keeping Your Setup Future-proof
Technology changes quickly. To avoid buying new equipment every year, consider these points:
- Choose a dock with Thunderbolt 4 or USB4 if your laptop supports it. These work with many new devices.
- Buy longer cables if you might change desk layout.
- Choose monitors with multiple input types (HDMI, DisplayPort) for flexibility.
Helpful Resources
If you want to read more about docking stations and compatibility, you can check this PCMag guide to docking stations.
Setting up a docking station at home may seem complicated, but with careful planning and the right equipment, you can enjoy a more comfortable and productive work environment. Small details—like cable management and choosing the right dock—make a big difference over time.
Take the time to get it right, and you’ll thank yourself every day you sit down to work.
Frequently Asked Questions
What Is The Main Difference Between A Docking Station And A Usb Hub?
A docking station connects your laptop to many devices, including monitors, Ethernet, and power. A USB hub only adds extra USB ports and usually does not support displays or charging.
Can I Use Any Docking Station With Any Laptop?
No. You must check your laptop’s ports (USB-C, Thunderbolt, etc.) and make sure the docking station is compatible. Some laptops need brand-specific docks.
How Many Monitors Can I Connect With A Docking Station?
This depends on the dock and your laptop. Many docks support two monitors, but some advanced models can handle three or more. Always check the specifications.
Does A Docking Station Charge My Laptop?
Many modern docking stations support power delivery, which charges your laptop. But not all do—especially older or basic models. Check the dock’s details before buying.
Do I Need To Install Software For My Docking Station?
Some docking stations work as soon as you plug them in. Others (especially those using “DisplayLink” for extra displays) need you to install drivers from the manufacturer’s website.
With these answers and the steps above, you can set up your home docking station with confidence and enjoy a much smoother workflow every day.
