Finding a matching lid for your favorite food container shouldn’t feel like a treasure hunt. But for many, organizing Tupperware and food containers is a daily headache. Stacks of plastic bowls, missing lids, and odd shapes eat up precious kitchen space. If you’re ready to turn your chaotic container drawer into a system that saves time and stress, this guide is for you. You’ll learn easy methods, clever storage hacks, and practical tips used by professional organizers. Even small kitchens can enjoy neat, accessible containers—no more lid avalanches or wasted minutes searching. Let’s transform your kitchen for good.
Why Organized Food Containers Matter
A messy container cabinet is more than just an eyesore. Disorganization leads to wasted time, increased stress, and even food waste. When you can’t find the right lid, you may end up buying more containers or using disposable options. According to a recent study, the average person spends 10 minutes per week searching for kitchen items. Over a year, that’s more than 8 hours lost.
Organized containers also help keep food fresh. When lids fit properly, leftovers last longer and there’s less risk of leaks. Plus, a tidy system makes meal prep and cleanup much faster. An organized kitchen is a productive and happy kitchen.
Step 1: Declutter And Sort
Before you can organize, you need to know what you have. Start by taking out all your containers and lids. Spread them on your kitchen table or counter.
1. Match Each Container To A Lid
Check every piece. Toss anything that’s warped, stained, or missing a partner. If you have too many of one size, keep only what you use most.
2. Decide What To Keep
Keep containers you use often. Let go of odd shapes, damaged pieces, or extras. If you haven’t used a container in six months, consider donating or recycling it.
3. Choose Your Favorites
It’s easier to organize when you have a few types or brands. If possible, stick to one or two styles—stacking is much simpler when sizes and shapes match.
Non-obvious insight: Don’t keep containers “just in case.” Most people use the same 5-7 pieces regularly. The rest just take up space.
Step 2: Group By Shape And Size
Once you’ve decluttered, group your containers by shape and size. This step prevents the classic “leaning tower of plastic” problem.
- Round containers: Stack all together
- Square and rectangular: Stack by size
- Small specialty items: Store in a separate bin
Here’s a quick comparison of grouping benefits:
| Grouping Style | Space Saved | Ease of Access |
|---|---|---|
| By Shape & Size | High | Very Easy |
| Mixed Randomly | Low | Difficult |
Tip: Stack from largest to smallest, with lids stored separately for easiest access.
Step 3: Choose The Right Storage Location
Where you store your containers makes a huge difference. The best spot is near where you prep food, often a lower cabinet or deep drawer. Avoid high shelves—reaching up with stacks can be dangerous.
- If you have a deep drawer, use it for containers and a nearby shallow drawer for lids.
- For cabinets, choose a shelf at waist or lower level for safety and convenience.
- In very small kitchens, consider using a section of your pantry or even a rolling cart.
Non-obvious insight: If you store containers too high or too low, you’ll avoid putting them away and clutter returns fast.
Step 4: Use Organizers And Dividers
A key to lasting organization is using simple tools that keep items separated and visible. You don’t need expensive systems—basic organizers work wonders.
Popular Organizer Types
- Lid racks: Keep lids upright and easy to grab
- Drawer dividers: Create sections for sizes or shapes
- Bins or baskets: Hold small containers or lids together
- Expandable shelves: Double your cabinet space for stacking
Here’s a sample of organizer options and their pros:
| Organizer Type | Best For | Average Cost |
|---|---|---|
| Lid Rack | Keeping lids sorted | $10–$20 |
| Drawer Divider | Separating shapes/sizes | $5–$15 |
| Basket/Bin | Grouping small items | $5–$10 |
Practical tip: Use an extra dish rack as a budget lid sorter.
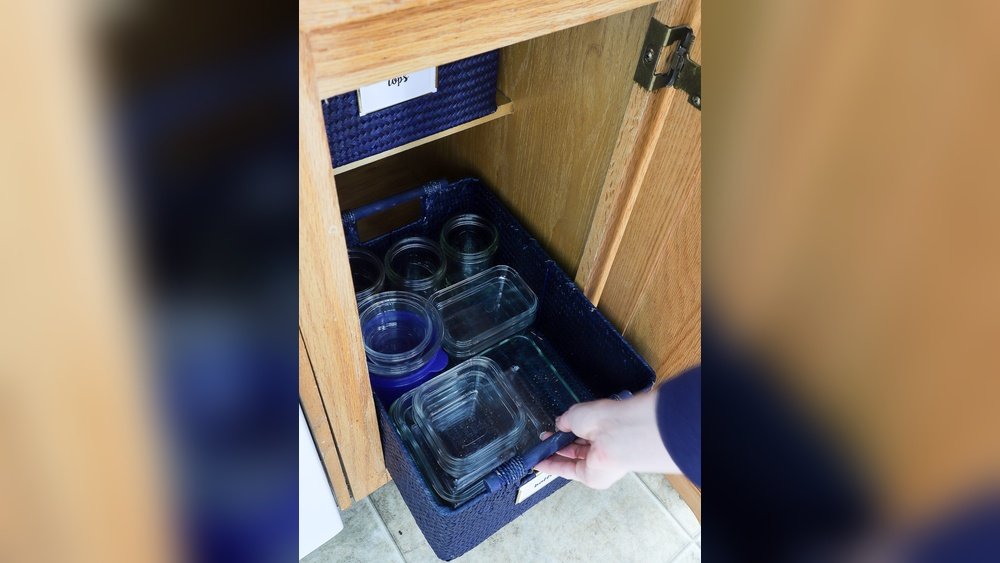
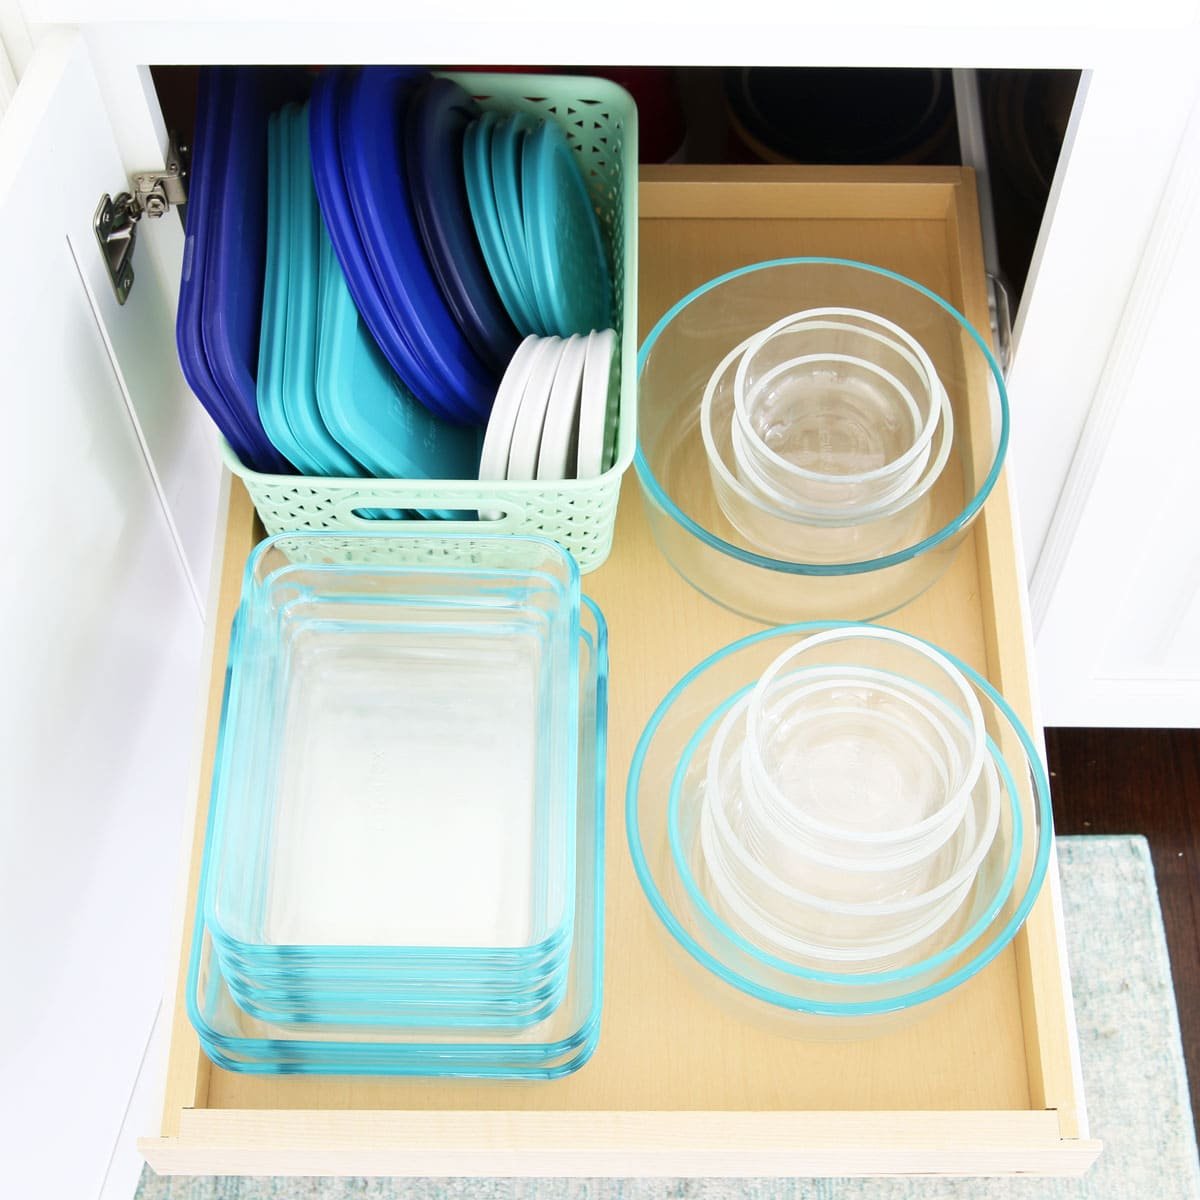
Step 5: Store Containers And Lids Separately
Many people try to nest containers with lids on, but this wastes space and makes it hard to find what you need. The best method:
- Nest containers by size
- File lids upright in a bin, rack, or along the side
This allows you to quickly grab the right base and match it with its lid, saving time. For families with kids, storing lids separately also makes it easier for everyone to help put items away.
Common mistake: Storing containers with lids attached. This doubles the space used and leads to missing pieces.
Credit: justagirlandherblog.com
Step 6: Label For Clarity
If you have many similar containers or share your kitchen, labels help everyone keep order. Use simple stickers or a label maker. Mark bins (“Large Lids,” “Small Rectangles,” etc.) or even shelves.
Benefits of labeling:
- Faster cleanup
- Less confusion
- Kids and guests can help
You don’t need fancy labels—masking tape and a marker work fine.
Step 7: Make Maintenance Easy
Organization isn’t a one-time event. Build habits to keep your system working:
- Check for missing pieces monthly
- Do a quick tidy-up each week
- Set a limit (e.g., 10 containers max—if you get a new one, donate an old one)
Pro tip: When you empty a container, wash and dry it right away, then put it back in its spot.
Step 8: Smart Solutions For Small Kitchens
Tight on space? Try these ideas:
- Wall-mounted racks for lids or small containers
- Under-shelf baskets to use vertical space
- Hang bins inside cabinet doors for lightweight lids
- Stackable containers—buy only those that nest tightly
- Use multi-purpose bins for rarely used containers, stored elsewhere
Here’s a look at how much space each solution can save:
| Solution | Space Saved |
|---|---|
| Wall-mounted Rack | Up to 30% |
| Under-shelf Basket | 15–20% |
| Stackable Containers | 25–40% |
Example: One family in a small apartment freed up an entire drawer by hanging a $12 rack inside a cabinet door for all their lids.
Step 9: Upgrade Your Container Collection
Not all containers are equal. Investing in good-quality, stackable sets makes organizing easier and lasts longer. Look for:
- Sturdy material: BPA-free plastic or glass
- Uniform shapes: Easier to nest and stack
- Interlocking lids: Less chance of lost pieces
If you’re starting over, choose rectangular containers—they fit better in fridges and cabinets than round ones. Glass containers, while heavier, don’t stain or hold odors.
Non-obvious insight: Some brands sell replacement lids. If you love a certain set, check if you can buy extra lids online.
:max_bytes(150000):strip_icc()/tupperware-organization-ideas-5093915-05-8614feea7d5248828c71e5c397d0be31.jpg)
Credit: www.thespruce.com
Step 10: Special Tips For Unique Needs
Some households have special organizing challenges:
- For large families: Use two bins—one for daily use, one for extras
- For meal preppers: Store matching sets together in “meal prep kits”
- For kids: Keep their containers on a low shelf so they can help themselves
If you pack lunches, dedicate a small bin just for lunchbox containers and lids. This saves time on busy mornings.
Handling Common Problems
Even well-organized systems can run into trouble. Here’s how to fix the most common issues:
- Lids keep getting lost: Use a lid organizer or a shallow tray in your drawer
- Containers fall over: Use dividers or bins to keep stacks stable
- Odd shapes don’t fit: Store rarely used shapes elsewhere, or let them go
If your system isn’t working, adjust it! Organization is personal—find what fits your space and habits.
:strip_icc()/BHG_10_Genius_Solutions_for_Storing_and_Organizing_Food_Storage_Containers_Alicia_Long_V1_01-4e996abc1159410e9202b3e9b73be7eb.jpg)
Credit: www.bhg.com
How Long Will It Take?
Most people can declutter and organize their containers in 1–2 hours. Maintenance each week takes just a few minutes. The time you save searching for lids adds up fast—many report saving 15–20 minutes each week.
Real-life Example
Sara, a busy mom, used to store all containers in a deep drawer. Lids were always missing, and cleanup took forever. She decluttered, bought two lid racks, and labeled bins. Now, her kids can pack their own lunches and containers are always easy to find.
She estimates she saves an hour a week and feels less stressed.
Additional Resources
Want more inspiration? Professional organizers share more tips and reviews of the best storage solutions at The Kitchn.
Frequently Asked Questions
How Do I Keep My Tupperware From Getting Stained?
Wash containers soon after use, especially after storing tomato-based sauces or oily foods. For stubborn stains, soak with baking soda and water overnight. Glass containers resist staining better than plastic.
What’s The Best Way To Store Lids?
Store lids upright in a rack, bin, or along the side of a drawer. This keeps them visible and easy to grab. Avoid stacking them flat, which can cause them to slide and get lost.
How Many Food Containers Do I Really Need?
Most households use 5–10 containers regularly. It’s better to have a few high-quality, stackable sets than many mismatched pieces. Keep extras only if you use them often.
Can I Recycle Old Or Broken Containers?
Many plastic containers are recyclable, but check the recycling symbol and local guidelines. Some types of plastic are not accepted everywhere. If possible, donate usable pieces to shelters or community kitchens.
What Should I Do If I Keep Losing Lids?
Try matching lids and containers right after washing, and always store them in the same place. Using organizers for lids reduces loss. If you lose lids often, consider switching to containers with attached lids or buying replacement lids from the manufacturer.
Transforming your Tupperware and food container storage isn’t just about neatness—it’s about making life easier. With these steps, you’ll spend less time searching and more time enjoying your kitchen. Start small, stick with your system, and enjoy the daily difference an organized kitchen makes.
