
Replacing a ceiling light fixture can change the look and feel of a room, making it brighter and more inviting. But many people feel nervous about working with electricity. The good news is, with the right steps and safety checks, you can install a ceiling light fixture safely—even if you’re not a professional electrician.
This guide walks you through every part of the process, from preparation to the final test. You’ll also learn common mistakes and practical tips most beginners miss. If you want to update your home lighting without stress or risk, this article is for you.
Why Safety Matters When Installing A Ceiling Light Fixture
Dealing with electrical wiring can be dangerous. Every year, thousands of people are injured because of electrical accidents at home. Even a small mistake, like not turning off the power, can lead to shocks or fires. That’s why it’s important to follow safety rules and never rush the process. Taking a few extra minutes can protect you, your family, and your home.
Tools And Materials You’ll Need
Gather everything before you start. This keeps the process smooth and avoids last-minute runs to the hardware store.
Essential Tools
- Screwdrivers: Both flat-head and Phillips types
- Wire stripper/cutter: For preparing wire ends
- Voltage tester: To check if power is off
- Pliers: For twisting wires together
- Drill (optional): For new holes or anchors
- Ladder or step stool: To safely reach the ceiling
Materials
- New ceiling light fixture
- Wire nuts/connectors: For secure wire connections
- Electrical tape: For added safety (optional)
- Mounting bracket/strap: Usually included with the fixture
- Light bulbs: Check the recommended type and wattage
Safety Gear
- Insulated gloves: To protect from accidental shocks
- Safety glasses: In case debris falls
Pro Tip: If your home is old, you might need special electrical boxes or supports to hold heavier fixtures. Always check before starting.
Credit: lightingshs.com
Step-by-step Guide To Safe Installation
Let’s break down the process into clear, manageable steps.
1. Turn Off The Power
Go to your electrical panel and switch off the breaker for the room where you’ll work. Don’t rely only on the wall switch—it may not cut all power to the fixture.
Double-check: Use a voltage tester on the fixture’s wires to confirm there is no electricity. This simple tool can prevent serious accidents.
2. Remove The Old Fixture
- Use a screwdriver to loosen the screws or nuts holding the old fixture.
- Carefully lower the fixture and support its weight.
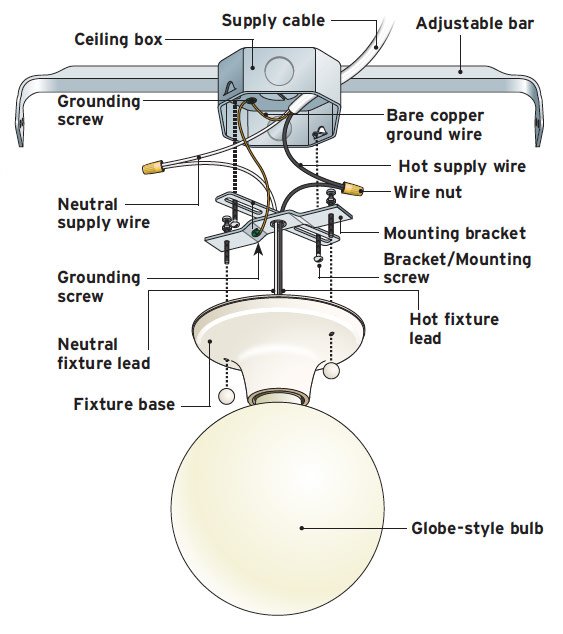
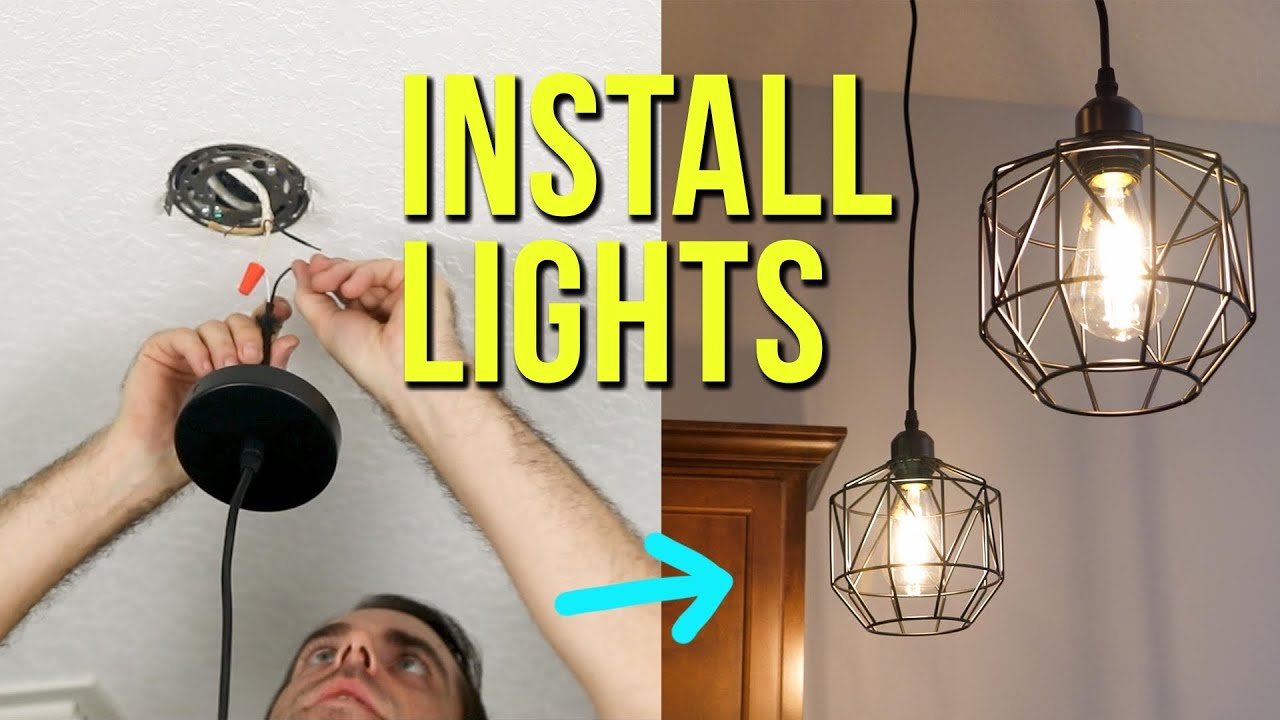
- Disconnect the wires: Usually, you’ll see black (hot), white (neutral), and sometimes green or bare copper (ground) wires. Unscrew the wire nuts and separate the fixture from the ceiling wires.
Tip: Take a photo of the wiring before disconnecting. It helps when connecting the new fixture.
3. Inspect The Electrical Box
Check that the ceiling box is secure and rated for the weight of your new fixture. If you feel movement or see damage, stop. Replace the box or add support before continuing.
Hidden risk: Older homes sometimes have boxes that aren’t grounded or can’t handle heavy fixtures. Don’t skip this check.
4. Prepare The New Fixture
- Assemble the fixture according to the manufacturer’s instructions.
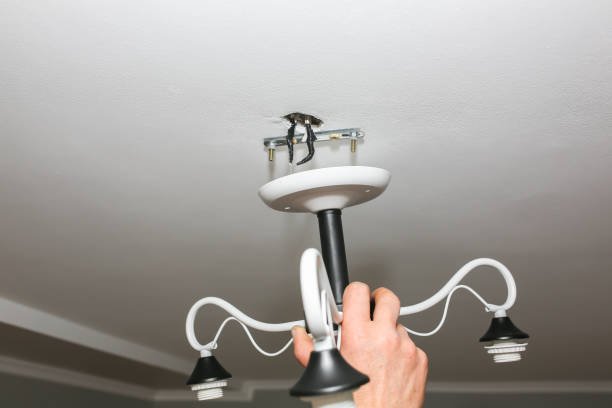
- Attach the mounting bracket or strap to the ceiling box.
- Thread the fixture’s wires through the center hole of the bracket.
Insight: Many new fixtures come with extra wire length. Trim excess, but leave about 6 inches for easy handling.
5. Connect The Wires
Match the ceiling wires to the fixture’s wires:
- Black (hot) to black
- White (neutral) to white
- Green or bare copper (ground) to green or grounding screw
Twist the wires together clockwise, then screw on a wire nut. Tug each connection gently to check that it’s firm.
If your ceiling only has two wires (common in older homes), connect the ground wire to the metal box with a grounding screw.
Extra safety: Wrap connections with electrical tape for added security.
6. Attach The Fixture To The Ceiling
Lift the fixture and align it with the mounting bracket. Use the provided screws to secure it. Make sure everything is tight, but don’t overtighten and crack the fixture’s base.
Watch out: Pinched wires can cause shorts. Tuck wires carefully into the box before tightening.
7. Install Bulbs And Covers
Add the recommended bulbs. Never exceed the maximum wattage listed on the fixture—it’s a fire hazard. Attach any glass shades or covers according to the instructions.
8. Restore Power And Test
Go back to the electrical panel and turn the breaker back on. Test the light using the wall switch. If it doesn’t turn on, switch off the power and check your wiring again.
Unexpected issue: If bulbs flicker or don’t work, double-check that all wire connections are secure and that the bulbs are seated correctly.
Common Mistakes And How To Avoid Them
Many DIY installers make the same errors. Here’s how to dodge the most frequent problems:
Not Turning Off The Power
Always verify power is off with a voltage tester. Don’t rely on just flipping a wall switch.
Ignoring The Ground Wire
A missing ground is a safety risk. If you don’t see a ground wire, consult a qualified electrician.
Using The Wrong Wire Nuts
Too small or too large wire nuts can cause loose connections. Use the size recommended for the number and size of wires.
Overloading The Electrical Box
If your new fixture is much heavier than the old one, make sure your ceiling box is rated for the load (usually marked inside the box).
Incorrect Bulb Type Or Wattage
Using the wrong bulbs can overheat and damage the fixture. Always follow the label inside the fixture.
Choosing The Right Ceiling Light Fixture
Selecting a new fixture isn’t only about style. Here are factors to consider:
Room Size And Ceiling Height
Larger rooms need brighter fixtures or multiple bulbs. Low ceilings require flush-mount designs, while higher ceilings can use hanging or pendant lights.
Fixture Weight
Heavy fixtures (like chandeliers) need reinforced boxes and strong mounting hardware. Check the packaging for weight details.
Electrical Compatibility
Some modern LED fixtures need special dimmer switches. Check if your wiring and switches are compatible.
Energy Efficiency
LED and CFL bulbs use less energy and last longer than traditional incandescent bulbs. This saves money and reduces heat in the room.
Practical Examples: Comparing Fixture Types
Here’s a simple comparison of common ceiling light fixture types and their uses.
| Fixture Type | Best For | Energy Use | Typical Weight |
|---|---|---|---|
| Flush Mount | Bedrooms, hallways | Low (with LED/CFL) | Light |
| Semi-Flush | Living rooms, kitchens | Medium | Medium |
| Chandelier | Dining rooms, foyers | Varies | Heavy |
| Pendant | Kitchen islands, bars | Low | Light/Medium |
Tip: Always measure the space before buying. Large fixtures in small rooms can look out of place.
Safety Ratings And Legal Codes
Not all light fixtures are approved for all spaces. Bathrooms and wet areas require special ratings (like “damp location” or “wet location” listed on the box). Also, your city may have electrical codes that affect installation.
Here’s a summary of what to check:
| Location | Required Rating | Common Feature |
|---|---|---|
| Bathroom | Damp location | Sealed wiring |
| Outdoor | Wet location | Weatherproof housing |
| Kitchen | General indoor | Standard wiring |
If you’re unsure about codes or local rules, ask at your hardware store or look up the National Electrical Code in your area.
What To Do If Something Goes Wrong
Sometimes, even careful installers face challenges. Here’s how to handle common problems:
- No power to fixture: Check the breaker and that all wires are connected correctly.
- Flickering bulbs: Try different bulbs or retighten wire connections.
- Burning smell or smoke: Immediately turn off power and remove the fixture. Call a licensed electrician.
Never ignore unusual smells, sounds, or heat. Electrical problems can become emergencies quickly.
Credit: www.finehomebuilding.com
Extra Tips For A Professional Result
- Label wires with tape if colors are faded or confusing.
- Ask a friend for help if the fixture is large or heavy.
- Keep old parts until you know the new fixture works.
- Use LED bulbs for longer life and less heat.
- Check for rebates on energy-efficient lighting in your area.
Non-obvious insight: Many people don’t realize that some fixtures need a special dimmer switch to avoid buzzing or flickering. Always read both the fixture and dimmer instructions before installing.
When To Call A Professional
If you see aluminum wiring (usually gray, not copper) or if your wires look damaged or brittle, stop. These situations need an electrician. Also, if you’re unsure about the ceiling box strength or any step, it’s worth getting expert help.
According to the U. S. Consumer Product Safety Commission, faulty home wiring is a leading cause of house fires. Safety is always more important than saving a few dollars.
For more on electrical safety, visit the Electrical Safety Foundation International.
Credit: www.youtube.com
Frequently Asked Questions
How Do I Know If My Electrical Box Can Hold A Heavy Fixture?
Look inside the box for a label showing the maximum weight it can support. Standard boxes often hold up to 50 pounds, but heavy chandeliers may need a special “fan-rated” or reinforced box. If the box wobbles or is plastic, replace it before installing a heavy light.
What Should I Do If There’s No Ground Wire?
If your home’s wiring has no ground, connect the fixture’s ground wire to the metal electrical box using a grounding screw. If the box isn’t grounded, call a licensed electrician for advice.
Can I Install A Ceiling Light Fixture Without Turning Off The Main Power?
No. You must turn off the circuit breaker to the room. Never work with live wires. Always check with a voltage tester before touching any wire.
Why Is My New Light Fixture Flickering?
Flickering is usually caused by loose wire connections, incompatible bulbs, or an old dimmer switch. Turn off the power and check all connections. Try using a different bulb or update the dimmer switch if needed.
Do I Need A Permit To Install A Ceiling Light Fixture?
In most areas, replacing a fixture doesn’t require a permit, but major changes to electrical wiring might. Always check your local building codes or ask your city’s building department.
Upgrading your ceiling light fixture is a rewarding DIY project that brings instant results. By following these clear steps and safety checks, you can enjoy a brighter, safer home without worry. Take your time, double-check your work, and don’t hesitate to ask for help when needed.
Your new lighting will shine—safely and beautifully—for years to come.