If you enjoy baking, you know how quickly the kitchen can become messy. Flour bags spill, measuring spoons get lost, and cupcake liners hide at the back of drawers. When your supplies are hard to find, even simple recipes become stressful.
But imagine opening your cabinet and finding every tool and ingredient ready to use. Organizing your baking supplies is not only about neatness—it saves time, reduces waste, and makes baking more fun.
Setting up a smart system in your kitchen doesn’t require a fancy pantry or endless space. With a few practical strategies, anyone can keep their baking essentials tidy and easy to reach. Below, you’ll discover step-by-step guidance to transform your kitchen into a baker’s paradise, even if you’re working with limited room.
Understanding Your Baking Inventory
Before organizing, you need to know what you have. Many people buy duplicates because they can’t find what’s hidden in their cupboards. Take everything out of your cabinets, shelves, and drawers that relates to baking. This includes:
- Flour, sugar, and other dry ingredients
- Leaveners like baking powder and soda
- Spices and flavorings
- Mixing bowls, measuring cups, and spoons
- Baking pans, trays, and molds
- Rolling pins, whisks, and spatulas
- Decorative items (sprinkles, piping bags)
- Appliances like mixers or scales
Check expiration dates and get rid of anything old or never used. You may be surprised at how many half-empty baking powder tins or crusty brown sugar bags you find. This step also helps you spot gaps—maybe you have three muffin tins but no cooling rack.
One insight many beginners miss: Many baking ingredients last longer than you think if stored well, but some, like baking powder or yeast, lose effectiveness quickly. Make a note to check these every few months.
Choosing The Right Storage Containers
Good containers keep ingredients fresh and prevent spills. They also make it easy to see what you have.
What To Look For In Containers
- Airtight seal: Keeps flour, sugar, and cocoa from absorbing moisture or smells.
- Clear sides: You can see when you’re running low.
- Stackability: Saves space in cabinets or on shelves.
- Labels: No more mixing up salt and sugar.
Glass Vs. Plastic
Some bakers prefer glass jars because they don’t hold smells and are easy to clean. Others use high-quality BPA-free plastic for lighter weight and shatter resistance. Below is a comparison to help you decide:
| Feature | Glass | Plastic |
|---|---|---|
| Durability | Breakable | Shatterproof |
| Weight | Heavy | Lightweight |
| Odor Retention | No | Possible |
| Dishwasher Safe | Yes | Usually |
Choose what fits your kitchen and budget, but always check for a tight lid.
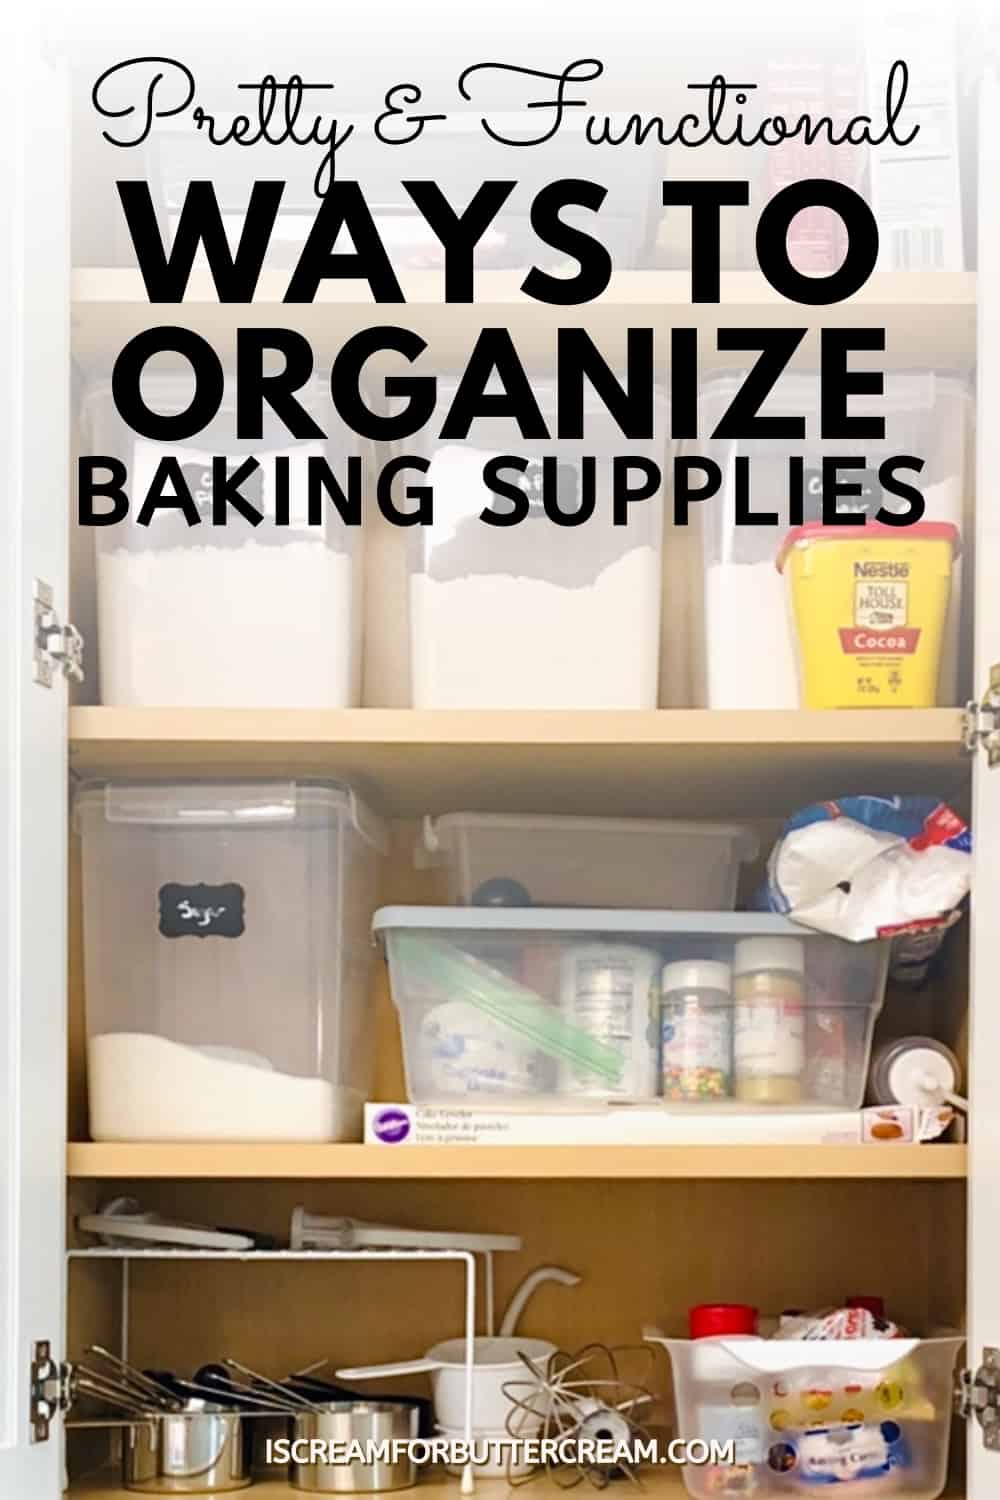
Credit: iscreamforbuttercream.com
Grouping Supplies By Use
It’s easier to bake when similar items are together. Group your supplies by how you use them:
- Dry ingredients: Flour, sugars, cocoa, baking powder, salt
- Decorating tools: Piping tips, sprinkles, food coloring
- Measuring tools: Cups, spoons, kitchen scale
- Mixing tools: Whisks, spatulas, mixing bowls
- Baking pans: Muffin tins, cake pans, cookie sheets
Store each group in one area. For example, keep all measuring spoons on a ring in a drawer near your baking prep space.
A common mistake is to organize by shape or size rather than use. For example, putting all metal pans together (including roasting pans) mixes up baking and cooking tools. Keep baking-only pans in one spot.
Making The Most Of Small Spaces
Many home bakers work in kitchens with little storage. But even in small spaces, you can store everything you need. Try these solutions:
- Vertical space: Add shelf risers or stackable bins to double your cabinet space.
- Cabinet doors: Install hooks or racks inside doors for measuring spoons or oven mitts.
- Drawer organizers: Prevent small items from sliding around.
- Rolling carts: A slim cart with shelves fits beside your counter and holds ingredients or tools.
Here’s a quick look at how different solutions can maximize space:
| Solution | Best For | Where to Use |
|---|---|---|
| Shelf Risers | Jars, containers | Cabinets |
| Hooks/Racks | Utensils | Cabinet doors |
| Drawer Dividers | Measuring tools | Drawers |
| Rolling Cart | Bulk ingredients, appliances | Next to counter |
Don’t forget about the space above your fridge or stove—just avoid storing anything that could be damaged by heat.
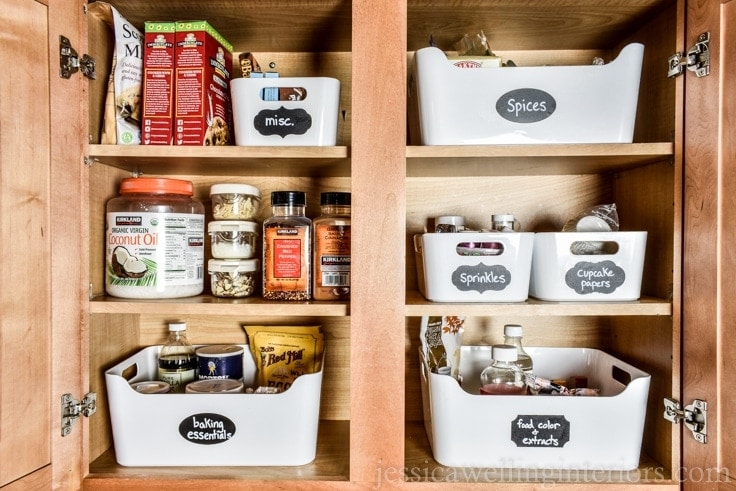
Credit: www.clutterkeeper.com
Labeling: The Secret To Easy Baking
Labels do more than just look tidy. They keep everyone in your household on the same page. Use clear, large lettering for each container—flour, powdered sugar, brown sugar, etc. For even more clarity, add the purchase or expiration date on the back.
Some people use chalkboard labels so they can erase and update contents. Others prefer printed labels for a clean look. Both work well—just make sure the label is easy to read at a glance.
One non-obvious tip: Label the bottom or side of containers with baking temperature or conversions (for example, “1 cup flour = 120g”). This saves time and avoids mistakes.
Organizing Baking Pans And Tools
Baking pans come in many shapes and sizes, making them tricky to organize. Try these approaches:
- File vertically: Use a rack or divider to store pans upright like files. This makes it easy to grab the one you need.
- Nest carefully: If stacking, place a soft towel between pans to avoid scratches.
- Hang tools: Hooks under cabinets or on walls are perfect for whisks, spatulas, and rolling pins.
For small tools, a divided drawer tray keeps everything visible. If you bake often, keep your most-used pans near the oven and rarely-used ones higher up.
An insight for beginners: Don’t store pans with food residue or grease—they attract pests and smells. Clean and dry thoroughly before putting away.
Keeping Ingredients Fresh
Proper storage extends the life of your baking supplies. Here are some quick rules:
- Flour: Store in airtight containers; use within 6-8 months. Whole wheat flour spoils faster.
- Brown sugar: Keep in a sealed container with a piece of bread or a brown sugar saver to prevent hardening.
- Yeast: Keep unopened packets in the fridge. Once open, use quickly.
- Nuts and seeds: Store in the freezer to prevent rancidity.
A lot of people forget: Warm, humid kitchens make ingredients spoil faster. If your kitchen gets hot, consider storing some supplies in a cool pantry or even the fridge.
Arranging Spices And Flavorings
Baking often uses vanilla, cinnamon, nutmeg, and other flavorings. These small bottles get lost easily. Try these tips:
- Spice rack: A tiered rack in the cabinet or on the counter keeps spices visible.
- Drawer insert: Lay jars flat with labels facing up.
- Lazy Susan: A spinning tray makes it easy to grab what you need.
Group spices by use: baking (cinnamon, nutmeg) vs. cooking (oregano, basil). Keep vanilla extract and other liquids upright to avoid leaks.
Setting Up A Baking Station
If you bake often, consider making a dedicated baking station. It doesn’t need to be big—a single cabinet, drawer, or part of your counter works. Store your mixing bowl, measuring tools, and most-used ingredients together. This way, you don’t have to hunt for items each time.
A baking station can include:
- A container for flour and sugar
- A mixing bowl and measuring tools
- A few favorite pans
- A towel for quick cleanup
If you share a kitchen, mark your baking area with labels or a tray to keep things from getting mixed up.
Rotating And Replenishing Supplies
Organization isn’t a one-time project. Every few months, check your supplies:
- Move older ingredients to the front so you use them first.
- Replace anything expired or running low.
- Wipe down containers and shelves.
This habit prevents waste and keeps you ready for any baking project.
One advanced tip: Keep a small notepad or digital list of ingredients you’re low on. When you shop, check your list before buying more.
Cleaning And Maintenance
Cleanliness matters in baking. Crumbs, flour dust, and sticky spills attract bugs and mold. Every few weeks:
- Empty and wipe containers.
- Sweep shelves and drawers.
- Wash tools and pans before storing.
This keeps your supplies fresh and your kitchen healthy.
Organizing For Special Diets
If you or family members bake gluten-free, vegan, or allergy-friendly treats, separate these supplies. Use different containers, tools, and pans to avoid cross-contamination. Mark these items clearly—color-coded labels work well.
You might also store these ingredients higher up or in a separate bin. This makes it easy to grab what you need and keeps everyone safe.

Credit: www.clutterkeeper.com
When To Upgrade Or Replace Supplies
Over time, containers crack, pans warp, and tools wear out. Don’t wait for a disaster—a broken jar or rusty pan can ruin your baking day. Check supplies every year and upgrade if needed.
Signs it’s time to replace:
- Lids don’t seal tightly
- Nonstick pans peel or scratch
- Measuring cups fade or warp
- Spatulas melt or smell
Investing in good-quality basics saves money and headaches in the long run.
Digital Tools For Staying Organized
Apps can help you track pantry inventory, recipes, and expiration dates. Some popular options include Pantry Check and AnyList. These tools send reminders when you’re running low or something is about to expire.
If you prefer paper, keep a simple chart on the inside of your cabinet door. List what you have and update it as you bake.
Common Mistakes To Avoid
Many bakers make the same errors when organizing. Here are some to watch for:
- Storing supplies above the stove or dishwasher (heat and steam spoil ingredients)
- Keeping original bags inside containers (pour them out to avoid hidden pests)
- Forgetting to label expiration dates
- Mixing baking and non-baking items (leads to clutter)
- Ignoring regular cleaning
By avoiding these mistakes, your kitchen stays safe and efficient.
Inspiration From Professional Kitchens
Professional bakeries follow strict organization because time is money. They use clear containers, label everything, and keep workspaces uncluttered. Try visiting a bakery supply store or searching online for kitchen organization ideas. Even small changes, like adding a shelf or rearranging tools, can make a big difference.
For more tips on food storage safety, see the USDA Food Storage Chart.
Frequently Asked Questions
How Do I Keep Flour And Sugar From Getting Bugs?
Store them in airtight containers and keep the containers clean and dry. If you live in a humid area, consider freezing flour for a few days before storing to kill any insect eggs.
What Is The Best Way To Organize Measuring Cups And Spoons?
Hang them on hooks inside a cabinet door, or use a drawer organizer with divided sections. Keeping them together prevents searching and saves time.
How Often Should I Check My Baking Supplies?
Review your ingredients and tools every three to six months. Toss anything expired and wipe down all containers to keep everything fresh.
Can I Store Baking Ingredients In The Fridge Or Freezer?
Yes, items like nuts, seeds, whole grain flours, and yeast stay fresher in the fridge or freezer. Just use airtight containers to prevent moisture.
What Should I Do With Rarely Used Baking Tools?
Store them on higher shelves or in a separate box. Only keep everyday items in easy reach to avoid clutter and make baking more efficient.
By following these steps, you’ll turn your kitchen into a place where baking is simple, joyful, and stress-free. When everything has its place, you can focus on creating delicious treats instead of hunting for missing tools. Start small, stay consistent, and enjoy the benefits of a well-organized baking space.
For more helpful guides, check out small rental kitchen organization ideas, magnetic spice rack organization ideas, and kitchen cart vs kitchen island for small space.
- Take Everything Out
Remove all baking supplies from cupboards and drawers. Discard expired items and anything you no longer use.
- Sort by Category
Group items into categories: flours and sugars, leavening agents, spices, tools and equipment, and baking molds.
- Designate a Baking Zone
Choose one area of your kitchen — ideally near the oven and counter space — as your dedicated baking zone.
- Use Clear, Labeled Containers
Transfer flour, sugar, and other dry goods into airtight clear containers. Label each container clearly for quick identification.
- Store Tools Vertically
Use a utensil holder or hooks to store spatulas, whisks, and rolling pins vertically. This saves drawer space and keeps tools accessible.
- Keep Frequently Used Items Accessible
Place items you bake with most often at the front of shelves or at eye level. Store rarely used equipment higher up or in back.
