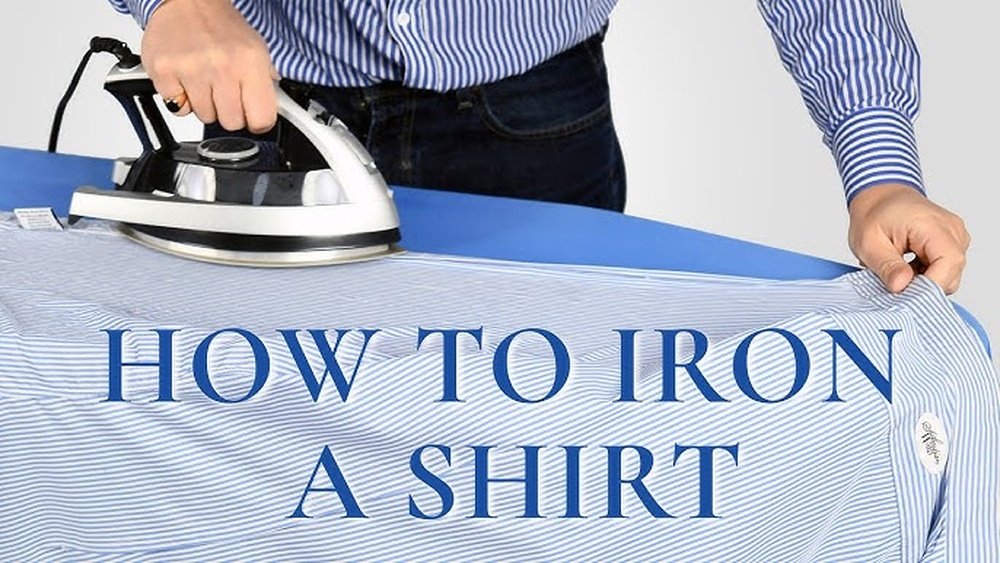
Ironing dress shirts is an art that separates a sharp look from a sloppy one. A perfectly ironed shirt sends a clear message: you care about details. Many people struggle with wrinkles, shiny spots, or creases, even after spending lots of time ironing. But with the right method, you can iron dress shirts like a professional at home—saving money, time, and frustration. Here, you’ll learn not just the basic steps, but also practical tips and insights that dry cleaners use. Even if you’re new to ironing, you’ll soon master the process and gain confidence every time you pick up an iron.
Why Ironing Dress Shirts Properly Matters
A well-ironed shirt is more than just neat. It can boost your confidence, help you make a great impression at work or events, and even make your clothes last longer. Wrinkles and poor creases can make even an expensive shirt look cheap.
On the other hand, a crisp shirt with smooth fabric stands out in any setting.
Ironing also helps maintain the fabric’s structure. Cotton, linen, and blends can all look tired if not cared for. If you follow a professional method, you’ll avoid damage like shiny patches (from too much heat) or burns. You’ll also be faster and more efficient, getting better results with less effort.
What You Need: Tools And Setup
Before you start, having the right tools makes a huge difference. Here’s what every professional uses:
- Steam iron – A quality iron with adjustable temperature and steam settings. Steam helps relax fibers and remove tough wrinkles.
- Ironing board – A sturdy, well-padded board. Avoid ironing on beds or tables; the result is never as crisp.
- Spray bottle with water – For stubborn wrinkles or dry fabrics.
- Clean cloth (pressing cloth) – Protects delicate fabrics and prevents shiny spots.
- Starch (optional) – For a crisper finish, especially on collars and cuffs.
Before ironing, check the shirt label for fabric type and heat recommendations. Silk, cotton, and polyester all need different temperatures.
Preparing The Shirt For Ironing
Never skip preparation—it’s the secret behind a professional finish. Follow these steps:
- Wash and dry properly. Start with a clean shirt. If the shirt is still damp (not wet), it’s perfect for ironing. If fully dry, use a spray bottle to mist lightly.
- Check for stains. Heat can set stains forever. Make sure the shirt is clean before you iron.
- Unbutton everything. This includes collar, cuffs, and even sleeve plackets. Ironing a buttoned shirt causes creases and missed spots.
- Flatten seams and collars with your hands. This simple trick helps the iron do a better job.
A surprising tip: always shake out the shirt after washing and hang immediately. This reduces deep wrinkles and cuts ironing time.
The Professional Ironing Order
Ironing a dress shirt in the right order is key. Professionals follow a sequence to avoid making wrinkles while ironing. Always start with the smallest parts and finish with the largest.
| Step | Area to Iron | Why First? |
|---|---|---|
| 1 | Collar | Most visible; avoids creases when moving to body |
| 2 | Cuffs | Removes wrinkles in hard-to-reach places |
| 3 | Sleeves | Prevents double creasing |
| 4 | Shoulders/Yoke | Prepares for main body |
| 5 | Front panels | Ensures a smooth chest and button placket |
| 6 | Back panel | Last, to keep other areas wrinkle-free |
Step-by-step Guide: Ironing Each Part Like A Pro
Collar
Lay the collar flat on the ironing board, underside up. Start from the points and move toward the center. Then flip and repeat on the outer side. Press gently—don’t force the fabric. For a crisp look, use a little spray starch.
Avoid ironing over the collar stays if they aren’t removable.
Cuffs
Unbutton and lay cuffs flat. Iron the inside first, then the outside. Be careful with buttons—iron around, not over them, to prevent damage. If the cuff is double (French cuff), iron both layers separately for a smooth finish.
Sleeves
Sleeves are tricky, but professionals avoid sharp creases unless a military look is needed. Lay one sleeve flat, align the seam, and start at the cuff, moving toward the shoulder. Use light pressure and steam. Flip and repeat on the other side. To avoid a double crease, insert a sleeve board if you have one. If not, iron carefully, then hang the shirt immediately.
Shoulders And Yoke
Slide the shoulder area over the narrow end of the ironing board. Iron from the center out to each shoulder. This area often has tough wrinkles, so use extra steam if needed.
Front Panels
Place one front panel flat on the board. Iron around the buttons (never over them). Work from the shoulder down, using steam for stubborn wrinkles. Pay attention to the placket (the fabric strip with buttonholes), as it’s highly visible.
Back Panel
Finally, lay the shirt with the back facing up. Start at the top and work your way down. If the shirt has pleats (extra folds at the center back), open them gently with your fingers and iron in place.
A common mistake: rushing the order. If you iron the back or sleeves first, you’ll likely create new wrinkles and have to redo your work.
Key Techniques For A Flawless Finish
- Use steam, not just heat. Steam relaxes fibers and removes wrinkles faster. If your iron has a burst steam button, use it on tough spots.
- Keep the iron moving. Don’t leave it in one place, or you risk burning or shining the fabric.
- Apply light pressure. Let the weight of the iron do the work—pushing hard can stretch and distort the shirt.
- Iron in straight lines. Avoid circular motions, which can twist the fibers.
- Hang immediately after ironing. This sets the smoothness and prevents new wrinkles.

Credit: food52.com
Starch Or No Starch?
Starch creates a crisp look, but overusing it can damage some fabrics or cause buildup. Use a light spray for collars and cuffs if you want extra sharpness. For the main body, only use starch on cotton shirts, not blends or synthetics.
| Shirt Fabric | Recommended Starch Use | Notes |
|---|---|---|
| Cotton | Light to medium | Crisp look, easy to iron |
| Polyester/cotton blend | Very light | Too much starch causes buildup |
| Linen | Medium | Needs more steam and care |
| Silk or synthetics | None | Use pressing cloth, no starch |
Avoiding Common Mistakes
Even experienced ironers sometimes make simple errors. Here are the most frequent, and how to avoid them:
- Ironing dirty shirts. Heat sets stains forever.
- Ignoring the care label. Using the wrong temperature can scorch or shrink your shirt.
- Ironing over buttons. This breaks or melts them.
- Letting the iron sit still. Causes burns or shiny spots.
- Skipping the pressing cloth. Especially for dark or delicate fabrics, always use a cloth if unsure.
- Not emptying the iron’s water tank. Standing water can cause mineral buildup and stains.
A little-known tip: clean your iron’s soleplate regularly. A dirty soleplate can transfer stains and even stick to your shirt.
How To Maintain The Perfect Look
After all that effort, you want your shirt to stay sharp. Here’s how:
- Hang shirts on wide, padded hangers immediately after ironing.
- Button the top button and one in the middle. This helps keep the shape.
- Let shirts cool before wearing or storing. Warm fabric creases easily.
- Avoid overcrowding in the closet. Tightly packed shirts wrinkle again.
If you’re traveling, roll shirts instead of folding, or use a garment bag to keep them crisp.
When To Seek Professional Help
Some shirts are best left to the pros—especially those with complex fabrics (like silk), heavy starch needs, or detailed embroidery. Also, if you have many shirts and little time, a dry cleaner can be a good investment.
For most cotton or cotton-blend shirts, you can achieve a professional result at home. But don’t feel guilty using expert services when needed.

Credit: www.amazon.com
Choosing The Right Iron And Accessories
Not all irons are equal. For best results, choose an iron with:
- Adjustable temperature controls
- Strong steam output
- Non-stick, easy-to-clean soleplate
- Comfortable grip
Accessories like a sleeve board, pressing cloth, and spray bottle can make a big difference.
Here’s how some popular irons compare:
| Model | Steam Output | Temperature Controls | Price Range (USD) |
|---|---|---|---|
| Rowenta Focus | High | Precise | 70–100 |
| Philips Azur | Medium | Good | 60–90 |
| Black+Decker Allure | Medium | Basic | 35–50 |
For most home users, a mid-range iron with strong steam is more than enough.
Non-obvious Insights Professionals Use
- Iron shirts while slightly damp. This makes wrinkles vanish faster and gives a softer finish. Dry cleaners often mist shirts before pressing.
- Use the iron’s tip for details. The point of the iron is perfect for ironing around buttons, in pleats, and in tight spaces. Most beginners use only the flat base and miss these spots.
Another professional habit: always check the shirt in natural light before hanging. This helps catch any missed spots and gives a final quality check.

Credit: www.rowentausa.com
Resources For Further Learning
If you want to see advanced techniques or troubleshoot difficult fabrics, check resources like the Wikipedia page on ironing, which covers more details about fabric care and ironing history.
Frequently Asked Questions
How Do I Prevent Shiny Marks On My Shirt?
Shiny marks come from too much heat or pressure, especially on dark or synthetic fabrics. Always use the correct temperature for the fabric. Place a clean pressing cloth between the iron and shirt for extra protection.
Is It Better To Iron Shirts Wet Or Dry?
Slightly damp shirts iron much easier and faster. If your shirt is dry, lightly mist it with a spray bottle before ironing for best results.
Can I Iron All Fabrics The Same Way?
No. Always check the care label for the recommended heat and method. Cotton and linen need more heat and steam; synthetics require lower temperatures and sometimes a pressing cloth.
What Should I Do If I Burn My Shirt?
If you notice a burn mark, stop immediately. Gently dab with a damp cloth—sometimes, light marks can be lessened. For deep burns, the damage may be permanent, and the shirt might need replacing.
How Do I Keep Shirts Wrinkle-free After Ironing?
Hang shirts on wide hangers, button at least two buttons, and let them cool before wearing or storing. Never stuff shirts tightly in the closet, as this causes new wrinkles.
Ironing dress shirts like a professional is a skill anyone can learn. With the right tools, a little practice, and these expert tips, you can achieve a crisp, polished look every time—and keep your shirts looking their best for years.
For more helpful guides, check out portable clothes steamer vs travel iron, garment steamer vs iron which is better, and how to stop clothes from shrinking.
- Check the Fabric Care Label
Before ironing, check the shirt label for the recommended iron temperature. Cotton needs higher heat, synthetics need lower.
- Dampen the Shirt Slightly
Lightly mist the shirt with water or iron while slightly damp — this makes removing wrinkles much easier.
- Start with the Collar
Iron the collar first while it is fresh. Press from the collar tips toward the center to avoid creating creases at the points.
- Iron the Cuffs and Sleeves
Unbutton the cuffs and iron them flat. Then lay each sleeve flat and iron from shoulder seam to cuff in smooth strokes.
- Iron the Front Panels
Iron around buttons carefully. Use the tip of the iron to press between buttons. Iron the button placket first, then the rest of the front.
- Finish with the Back
Lay the back of the shirt flat on the board and iron from the yoke downward in broad smooth strokes. Hang immediately when done.
