Many people want to decorate their walls with photos but worry about making holes or damaging the paint. Whether you live in a rental apartment or simply like to change your decor often, there are ways to arrange photos on your wall without nails. With the right tools and creative ideas, you can have a stylish photo display that is both safe for your walls and easy to update. This guide will explain effective methods, step-by-step instructions, and smart tips for creating a beautiful gallery—no hammer required.
Why Avoid Nails For Hanging Photos?
Hanging pictures with nails can be a hassle. Removing nails often leaves ugly holes, chipped paint, or even cracked plaster. In rentals, this can mean losing your deposit. Even in your own home, you may want to avoid repairs each time you move or update your art. Using no-nail solutions keeps your walls smooth and lets you rearrange easily. Many of these methods are also faster and safer, with no need for tools or heavy lifting.
Tools And Materials You Can Use
Before you start, it’s important to know what’s available. Here are some popular products that help you hang photos without nails:
- Adhesive Strips (like Command Strips)
- Double-sided tape
- Removable adhesive hooks
- Poster putty
- Velcro strips
- Decorative washi tape
- Magnetic paint and magnets
- Wire grid panels
- Photo hanging strings or clips
- Picture ledges or shelves
Each method works best for certain wall types, frame weights, and styles. Let’s look at how to use these options in detail.

Credit: www.amazon.com
Method 1: Adhesive Strips
Adhesive strips are one of the most popular ways to hang photos without nails. Brands like Command offer strips designed for different weights.
- Clean the wall and the back of your frame with rubbing alcohol. This helps the adhesive stick better.
- Stick one side of the strip to the frame and the other to the wall.
- Press firmly for 30 seconds. Wait at least an hour before hanging anything heavy.
These strips hold frames flat and are easy to remove without leaving marks. They work best for smooth, clean surfaces. Most strips can handle up to 16 pounds, but always check the package for the weight limit.
Pro Insight
Many people forget to check the total weight of the frame with glass and matting. Always weigh your photo before choosing the strip size.
Method 2: Double-sided Tape
Double-sided tape is a quick solution for lightweight photos and posters. Choose a tape designed for wall use—some brands specialize in removable, non-damaging adhesives.
- Cut the tape to size and place it on the back edges of the photo or poster.
- Press the photo to the wall, smoothing out air bubbles.
This is best for paper prints or very light frames. Avoid using tape on textured walls, as it may not stick well.
Insider Tip
Test a small piece in an unseen corner first—some tapes can pull off paint, especially on older walls.
Method 3: Removable Adhesive Hooks
For photos with hanging wires or string, removable adhesive hooks can work well.
- Clean the wall area.
- Stick the hook to the wall and wait an hour before hanging the picture.
- Hang your photo by its wire or string.
These are great for heavier frames or when you want to swap artwork often.
Method 4: Poster Putty
Poster putty is soft, reusable, and easy to shape. It works for small, lightweight photos and is perfect for kids’ rooms or dorms.
- Roll a small piece of putty into a ball.
- Place it on each corner of your photo.
- Press the photo to the wall, smoothing gently.
Poster putty works best on flat, painted surfaces. It’s easy to remove, but may leave a slight oily spot on some walls.
Method 5: Velcro Strips
Velcro strips are strong and adjustable. They are ideal for gallery walls where you want to move or swap photos without reapplying adhesives.
- Attach one side of the Velcro to the wall and the other to your frame.
- Press the frame to the wall until you hear a click.
Velcro can hold more weight than tape or putty. Many strips are rated for up to 10 pounds.
Method 6: Decorative Washi Tape
If you want a fun, creative look, try washi tape. This colorful, patterned tape can double as both decoration and support.
- Stick the photo to the wall with small rolls of washi tape on the back, or
- Tape the edges or corners in a frame-like design.
Washi tape is best for photos printed on paper, and you can change the colors or patterns whenever you like.
Method 7: Magnetic Paint And Magnets
If you love to switch your photos often, magnetic paint is a clever solution.
- Paint a small area or the whole wall with special magnetic primer.
- After it dries, paint over with your chosen wall color.
- Use strong magnets to attach your photos.
This method is more work at first, but great for ongoing displays. It’s especially good in kids’ rooms or creative studios.
Method 8: Wire Grid Panels
Wire grid panels are trendy and practical. They let you hang multiple photos and small items together.
- Buy a lightweight metal grid. Lean it against the wall or use adhesive hooks to hang it.
- Attach photos with small clips or hooks.
This is perfect for a flexible, ever-changing display. You can also add notes, plants, or fairy lights.
Method 9: Photo Hanging Strings Or Clips
Photo string displays are simple and charming.
- Use removable adhesive hooks at the ends of your display area.
- Tie a string or thin wire between the hooks.
- Use small clips or clothespins to attach your photos.
This is great for collages or casual displays, and you can add or remove photos easily.
Method 10: Picture Ledges Or Shelves
If you want to avoid adhesives altogether, try picture ledges. These are thin shelves that hold frames upright.
- Look for self-standing ledges that do not require wall mounting.
- Arrange the ledges on top of furniture or against the wall.
- Lean your photos and art on the ledge.
This method lets you layer different sizes and styles. It’s easy to update your display without touching the wall.
Comparing No-nail Photo Hanging Methods
Here’s how popular methods compare for ease, cost, and wall safety:
| Method | Best For | Max Weight | Removability | Wall Safety |
|---|---|---|---|---|
| Adhesive Strips | Framed photos | 16 lbs | Easy | Very safe |
| Double-sided Tape | Paper prints | 1 lbs | Easy | Safe (test first) |
| Wire Grid Panels | Multiple photos | Varies | Very easy | Very safe |
| Picture Ledges | Changing displays | Varies | Very easy | Very safe |
Step-by-step: Planning Your Photo Layout
Before sticking anything to your wall, it helps to plan your design. Here’s a process that works:
- Choose your photos: Pick a theme or style—family, travel, black and white, etc.
- Print and gather frames: Decide if you want all matching frames or a mix.
- Lay out on the floor: Arrange your photos on the floor first. Try different shapes—grid, line, or freestyle.
- Measure your wall: Find the center and mark your starting point with painter’s tape.
- Photograph your layout: Take a quick photo to remember the arrangement.
- Test on the wall: Use painter’s tape to mark where each photo will go.
Planning first prevents mistakes and makes your final display look professional.
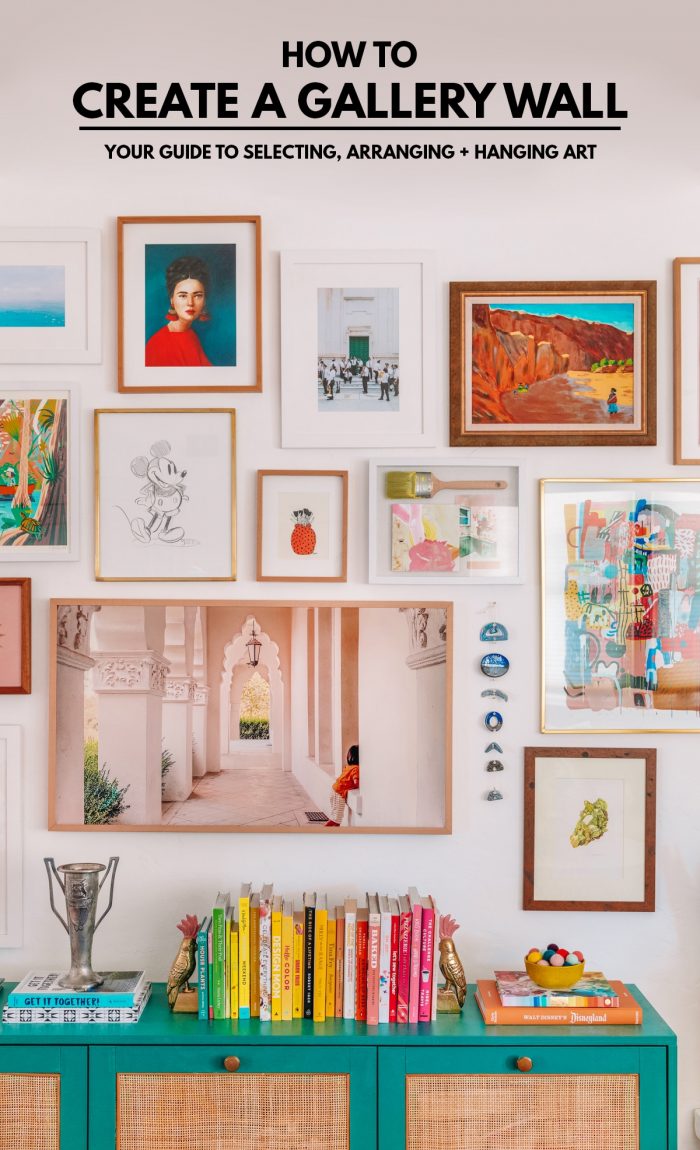
Credit: studiodiy.com
Creative Layout Ideas For Photo Walls
Want your photo wall to stand out? Here are some ideas:
- Grid: Arrange photos in straight lines for a modern look.
- Salon style: Mix sizes and shapes in a loose, clustered group.
- Linear: Hang photos in a straight horizontal or vertical line.
- Heart or shape: Place small prints in a heart or circle for a playful touch.
- Mixed media: Combine photos with art, mirrors, or 3D objects.
Whatever style you choose, keep the spacing even and balance the colors for the best effect.
Mistakes To Avoid When Arranging Photos Without Nails
Even with easy methods, beginners sometimes make errors. Here are two that are often missed:
- Overloading adhesives: Using too few strips or ignoring weight limits can cause frames to fall. Always check the weight rating.
- Skipping wall prep: Dust, grease, or old paint can stop adhesives from sticking. Clean your wall with mild soap and let it dry before applying anything.
Other common mistakes include placing photos too high or low, or skipping the layout step. Take your time for the best results.
Real-life Examples
Consider a renter who wants a gallery wall above their sofa. They use a mix of adhesive strips for heavier frames, washi tape for small prints, and a wire grid for postcards. After moving out, all the pieces come down in minutes, with no damage left behind.
Or, a student who changes photos every semester uses photo string displays. They simply unclip old photos and add new ones, keeping their room fresh and personal.
Cost Comparison
How do these methods compare in price? Here’s a quick look:
| Method | Starter Cost (USD) | How Many Photos |
|---|---|---|
| Adhesive Strips | ~$7 for 12 pairs | 6-12 frames |
| Poster Putty | ~$3 per pack | 20+ small photos |
| Wire Grid Panel | ~$15 per panel | 15+ photos |
| Washi Tape | ~$5 for 3 rolls | 30+ photos |
Adhesive solutions are affordable, but for big displays, panels or ledges can cost more upfront and last longer.

Credit: justagirlandherblog.com
Quick Safety & Wall Care Tips
- Wait at least an hour after applying adhesives before hanging heavy frames.
- Avoid hanging above beds or sofas if you’re unsure about strength.
- Remove adhesives slowly, following package instructions.
- Store extra strips or hooks in a cool, dry place for future use.
Where To Buy No-nail Photo Hanging Supplies
You can find most products at hardware stores, big retailers, or online. Always check reviews and weight ratings. For more ideas and product details, you can visit Home Depot’s guide.
Frequently Asked Questions
How Much Weight Can Adhesive Strips Hold?
Most adhesive strips can hold from 4 to 16 pounds, depending on the brand and size. Always check the package for the weight rating. For larger frames, use more strips or split heavy displays into smaller sections.
Will These Methods Damage My Walls?
Most no-nail methods are safe for painted walls if you follow instructions. Clean the wall first, and remove adhesives slowly. Test in an unseen corner before using on wallpaper or delicate finishes.
Can I Hang Canvas Art Without Nails?
Yes, many adhesive hooks and strong strips can support canvas art. Make sure the canvas has a wooden frame and is not heavier than the strip’s limit. For very large canvases, picture ledges or panels may be safer.
How Do I Keep Photos From Falling?
Always use the correct number and type of adhesives for your photo’s weight. Press firmly, wait for the adhesive to bond, and avoid humid or dusty walls. For extra safety, avoid hanging above sleeping areas or valuable items.
What If I Want To Rearrange My Photos Often?
Choose methods like Velcro strips, wire grids, or photo string displays. These let you swap photos easily without new adhesives each time.
Decorating your walls with photos doesn’t have to mean holes, tools, or repairs. With these nail-free methods, you can create a beautiful, flexible gallery that matches your style and keeps your walls in perfect shape.
