Proper cast iron skillet care involves regular cleaning with hot water and a stiff brush, immediate drying to prevent rust, and a light application of cooking oil after each use. Seasoning is the process of baking thin layers of oil onto the pan’s surface, creating a natural, non-stick, rust-resistant layer that improves with continued use and proper maintenance.
Understanding Your Cast Iron Skillet: A Foundation
Cast iron skillets are renowned for their durability, even heat distribution, and ability to retain heat, making them a favorite in kitchens for generations. Unlike modern non-stick pans, cast iron develops its non-stick properties through a process called seasoning. This layer is not merely a coating; it’s a polymerized oil surface that bonds with the iron, creating a smooth, protective barrier.
Understanding the fundamental nature of cast iron is crucial for its care. It is a porous material that, when exposed to moisture, is highly susceptible to rust. The seasoning layer acts as a shield against this corrosion, while also providing the desirable non-stick surface that improves with every use.
Initial Seasoning: Preparing Your New Cast Iron Skillet
Most new cast iron skillets come pre-seasoned from the factory, offering a basic protective layer. However, enhancing this initial seasoning can significantly improve performance and longevity. This process involves thoroughly cleaning the pan, applying a thin layer of oil, and baking it at a high temperature.
Even with pre-seasoned pans, an additional layer or two of home seasoning can help establish a more robust foundation. This step is particularly important for achieving optimal non-stick qualities and ensuring the pan is ready for diverse cooking tasks.
The Science Behind Cast Iron Seasoning
Seasoning is more than just applying oil; it’s a chemical transformation. When oil is heated to its smoke point, it breaks down and polymerizes, forming a hard, plastic-like coating that bonds to the iron. This process creates a smooth, hydrophobic (water-repelling) surface that prevents food from sticking and protects the metal from rust.
Each layer of seasoning builds upon the last, creating a stronger, more resilient surface. The key is to apply very thin layers of oil, as thick applications can lead to a sticky, uneven finish. Over time, with consistent use and proper care, the seasoning layer deepens and darkens, enhancing the skillet’s performance.
Everyday Cast Iron Skillet Care and Seasoning Guide
Consistent daily care is paramount to maintaining a healthy cast iron skillet. After each use, prompt and thorough cleaning is essential to prevent food residue from hardening and to protect the seasoning layer. This routine ensures your skillet remains a reliable cooking tool for years.
Cleaning After Each Use
- Scrape Food Residue: While the skillet is still warm, use a metal spatula or a plastic scraper to remove any stuck-on food particles.
- Wash with Hot Water: Rinse the skillet under hot running water. For stubborn bits, use a stiff brush or a non-abrasive scrubber. Avoid harsh detergents, especially on newly seasoned pans, as they can strip the seasoning.
- Avoid Soaking: Never leave cast iron to soak in water, as this can quickly lead to rust formation.
Drying and Oiling
- Immediate Drying: After washing, immediately dry the skillet thoroughly with a towel or paper towels. Any residual moisture can cause rust.
- Heat to Dry: For extra assurance, place the skillet on a stovetop over low heat for a few minutes until all moisture has evaporated.
- Apply a Thin Oil Layer: Once dry and slightly warm, apply a very thin layer of cooking oil (such as vegetable, canola, or grapeseed oil) to the entire surface of the skillet, inside and out.
- Wipe Excess Oil: Use a clean paper towel to wipe off any excess oil. The goal is to leave a barely visible sheen, not a greasy film. Too much oil can result in a sticky surface.
Deep Cleaning and Rust Removal for Cast Iron
Despite best efforts, cast iron can sometimes develop rust or accumulate stubborn food residues. Addressing these issues promptly is crucial to restore the skillet’s integrity and prevent further damage. Deep cleaning methods are designed to tackle these problems without permanently harming the pan.
Removing Stubborn Food Residue
- Salt Scrub: For heavily stuck-on food, pour a generous amount of coarse salt into the warm skillet and scrub with a paper towel or sponge. The salt acts as an abrasive without damaging the seasoning.
- Boiling Water: Fill the skillet with water and bring it to a boil on the stovetop. Simmer for a few minutes, then scrape with a wooden spoon or spatula to loosen residue.
Addressing Rust
- Light Rust: For minor rust spots, scrub with steel wool or a stiff wire brush. Apply a small amount of cooking oil to the rusted area as you scrub to help lift the rust.
- Heavy Rust: For more extensive rust, you may need to use a fine-grit sandpaper or an abrasive pad. Scrub until the rust is completely removed, revealing the bare metal underneath.
- Vinegar Soak (Extreme Cases): In severe cases, a short soak in a 50/50 solution of white vinegar and water can help. Do not soak for more than an hour, as vinegar can damage the iron. Monitor closely and remove as soon as the rust begins to loosen.
After any deep cleaning or rust removal, the skillet will likely need to be re-seasoned to restore its protective layer.
Re-Seasoning Your Cast Iron Skillet: Step-by-Step
Re-seasoning is necessary after deep cleaning, rust removal, or if your skillet’s non-stick properties have diminished. This process rebuilds the polymerized oil layer, ensuring your pan performs optimally.
- Preheat Oven: Preheat your oven to a temperature between 450-500°F (230-260°C).
- Clean Thoroughly: Wash the skillet thoroughly with hot soapy water and a stiff brush to remove any residue or loose seasoning. If removing rust, ensure all rust is gone.
- Dry Completely: Dry the skillet immediately and completely with a towel. Place it on a stovetop over low heat for a few minutes to ensure all moisture has evaporated.
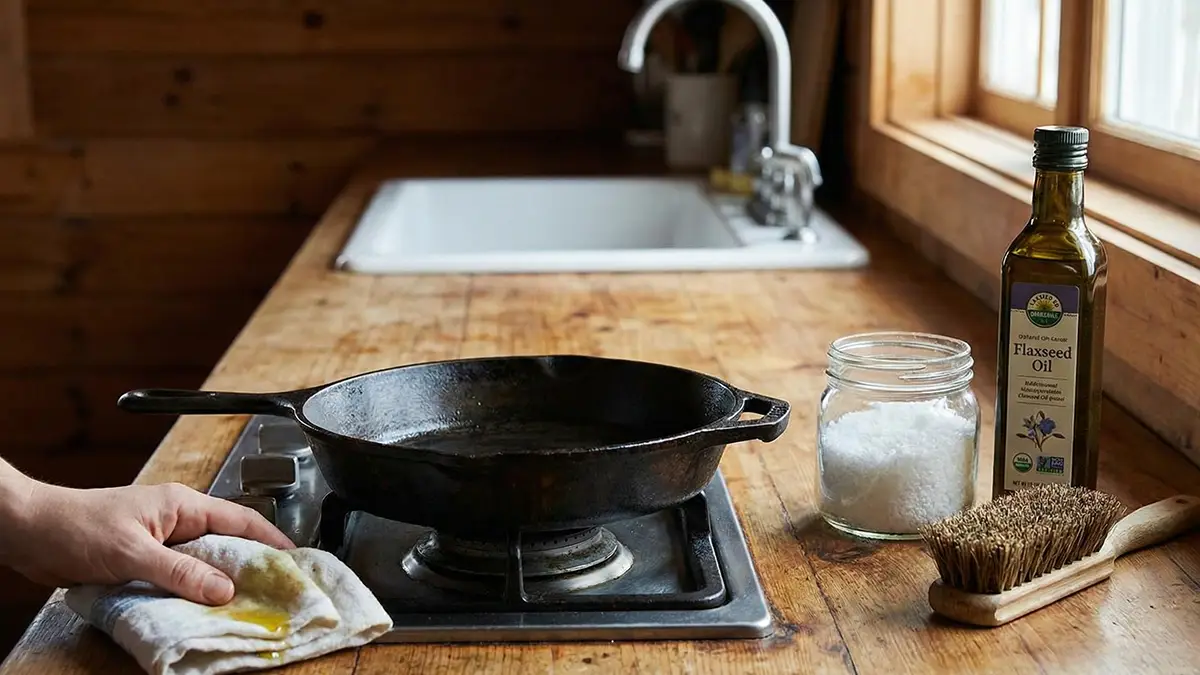
- Apply Thin Oil Layer: Apply a very thin, even layer of high smoke point cooking oil (such as flaxseed, grapeseed, or vegetable oil) to the entire skillet, inside and out. Use a paper towel to rub the oil in, then use a fresh paper towel to wipe off as much oil as possible. The surface should look dry, not greasy.
- Bake Upside Down: Place the skillet upside down on the middle rack of your preheated oven. Place aluminum foil or a baking sheet on the rack below to catch any drips.
- Bake for One Hour: Bake for one hour.
- Cool Slowly: Turn off the oven and allow the skillet to cool completely inside the oven. This slow cooling helps the seasoning bond effectively.
- Repeat for Best Results: For a more durable and effective seasoning, repeat steps 4-7 three to five times. Each layer contributes to a stronger, more resilient surface.
Common Cast Iron Care Mistakes to Avoid
Avoiding common pitfalls is just as important as following proper care instructions. Many issues with cast iron skillets stem from simple mistakes that can easily be corrected or prevented.
- Air Drying: Never allow your cast iron skillet to air dry. This is a primary cause of rust. Always dry it immediately and thoroughly after washing.
- Soaking in Water: Leaving a cast iron skillet to soak in water, even for a short period, can lead to rust. Clean it promptly after use.
- Using Harsh Soaps (Initially): While some modern dish soaps are mild enough for seasoned cast iron, it’s best to avoid them, especially on newer or freshly re-seasoned pans. Stick to hot water and a brush.
- Too Much Oil During Seasoning: Applying too much oil during seasoning or daily oiling will result in a sticky, gummy surface rather than a smooth, non-stick one. Always wipe off excess oil.
- Cooking Acidic Foods Too Soon: Highly acidic foods (like tomato sauce or lemon juice) can strip away new seasoning. Wait until your pan has a well-established, robust seasoning before cooking such ingredients.
- Using Metal Utensils Aggressively: While cast iron is durable, excessive scraping with sharp metal utensils can damage the seasoning. Use wooden or silicone utensils when possible, or be gentle with metal ones.
Advanced Tips for Maintaining a Perfect Season
Beyond the basics, a few advanced practices can help you achieve and maintain an exceptionally well-seasoned cast iron skillet. These tips focus on optimizing the seasoning process and protecting your pan during use.
- Flaxseed Oil for Initial Seasoning: Some enthusiasts swear by flaxseed oil for initial seasoning due to its high polymerization properties, creating a very hard, durable finish. It can be more expensive, but many find the results worthwhile.
- Oven Seasoning Maintenance: Periodically, perhaps every few months or after heavy use, consider giving your skillet a single oven seasoning treatment (steps 4-7 from the re-seasoning guide) to refresh and strengthen the existing layers.
- Frying and Sautéing: Regularly cooking with fats and oils, especially frying or sautéing, naturally contributes to the seasoning process. Each time you cook, you’re essentially adding another micro-layer of seasoning.
- Avoid High Heat Empty: Heating an empty cast iron skillet to extremely high temperatures for extended periods can damage the seasoning. Always add oil or food before heating to high temperatures.
- Use a Pan Scraper: Invest in a good pan scraper, often made of polycarbonate, to easily remove stuck-on food without damaging the seasoning.
Cooking with Cast Iron: Best Practices
Cooking with cast iron is a rewarding experience, offering superior results for many dishes. Following best practices ensures your food cooks perfectly while simultaneously enhancing your skillet’s seasoning.
- Preheat Properly: Cast iron takes longer to heat up than other pans, but it retains heat exceptionally well. Preheat your skillet slowly over medium-low heat for 5-10 minutes before adding food. This ensures even heat distribution and prevents hot spots.
- Use Enough Fat: Especially when your seasoning is still developing, use a generous amount of cooking oil or butter. This helps prevent sticking and contributes to the seasoning.
- Avoid Overcrowding: Overcrowding the pan can lower its temperature, leading to steaming instead of searing, and can cause food to stick. Cook in batches if necessary.
- Deglaze with Care: While deglazing with liquids like wine or broth is fine, avoid prolonged simmering of highly acidic sauces, especially in a new or poorly seasoned pan.
- Clean While Warm: Cleaning your skillet while it’s still warm (but not scorching hot) makes removing food particles much easier.
Storing Your Cast Iron Skillet Properly
Correct storage is vital for protecting your cast iron skillet from rust and maintaining its seasoning. Improper storage can undo all your hard work in caring for the pan.
- Completely Dry: Ensure the skillet is absolutely dry before storing. Even a tiny bit of moisture can lead to rust.
- Lightly Oiled: Store the skillet with a very thin layer of oil on its surface, wiped down to a dry sheen.
- Ventilated Area: Store in a dry, well-ventilated area. Avoid damp cabinets or areas prone to humidity.
- Prevent Scratches: If stacking multiple cast iron pieces, place a paper towel or a thin cloth between them to prevent scratching the seasoning.
- Hang if Possible: Hanging skillets on a pot rack allows for good air circulation and prevents scratching.
Frequently Asked Questions
How often should I season my cast iron skillet?
For everyday use, a light re-oiling after each cleaning is usually sufficient to maintain the seasoning. A full oven re-seasoning is typically only needed after deep cleaning, rust removal, or if the pan starts to show signs of food sticking consistently, which might be every few months to once a year depending on usage.
Can I use soap to clean my cast iron skillet?
Modern, mild dish soaps are generally safe for well-seasoned cast iron skillets and will not strip the seasoning. However, it’s best to avoid harsh detergents, especially on new or freshly re-seasoned pans. Hot water and a stiff brush are often all that’s needed for daily cleaning.
What is the best oil for cast iron seasoning?
High smoke point oils are ideal for seasoning. Common choices include vegetable oil, canola oil, grapeseed oil, and flaxseed oil. Flaxseed oil is often favored for its strong polymerization, creating a very durable finish, though it can be more expensive.
How do I remove rust from my cast iron skillet?
For light rust, scrub with steel wool or a stiff wire brush, possibly with a little cooking oil. For heavier rust, use fine-grit sandpaper. In extreme cases, a short soak in a 50/50 white vinegar and water solution can help, but monitor closely and re-season immediately afterward.
Why is my cast iron skillet sticky after seasoning?
A sticky skillet after seasoning usually indicates that too much oil was applied. The key to proper seasoning is to apply an extremely thin layer of oil and then wipe off as much excess as possible before baking. The surface should appear dry, not greasy, before it goes into the oven.
What are the benefits of following a proper cast iron skillet care and seasoning guide?
Following a proper care and seasoning guide ensures your cast iron skillet develops a natural non-stick surface, becomes highly durable, and is protected from rust. This leads to superior cooking performance, even heat distribution, and a pan that can last for generations with minimal effort.
Conclusion
Mastering cast iron skillet care and seasoning is a straightforward process that yields significant rewards in the kitchen. By consistently cleaning, drying, and lightly oiling your pan after each use, and performing a full re-seasoning when necessary, you can ensure your cast iron remains a cherished, high-performing cooking tool. Embrace these practices to enjoy the unique benefits and enduring legacy of cast iron cooking for many years to come.
{“@context”:”https://schema.org”,”@type”:”Article”,”headline”:”The Ultimate Cast Iron Skillet Care and Seasoning Guide”,”mainEntityOfPage”:”https://homegeartoday.com/cast-iron-skillet-care-and-seasoning-guide/”,”datePublished”:”2025-12-09T13:23:21+00:00″,”dateModified”:”2025-12-09T13:23:21+00:00″}
Wash and thoroughly dry the skillet. Apply a very thin layer of high-smoke-point oil (flaxseed, vegetable, or shortening) to all surfaces. Wipe off excess until the pan looks almost dry (too much oil causes stickiness). Bake upside down at 450–500°F for 1 hour. Cool in the oven. Repeat 3–5 times for initial seasoning.
Rinse with hot water and scrub with a stiff brush or chain mail scrubber immediately after cooking while still warm. Avoid dish soap for regular cleaning (it strips seasoning). Dry completely on the stovetop over low heat. Apply a very thin coat of oil while still warm and wipe away excess before storing.
Scrub the rusted area with steel wool until the rust is gone. Wash with soap and hot water (the only time soap is acceptable for cast iron). Rinse thoroughly, dry completely on the stove, then re-season in the oven (thin oil coat, 450°F for 1 hour, repeated 2–3 times to rebuild the protective seasoning layer).
Occasional use of a small amount of mild dish soap will not permanently damage a well-seasoned cast iron skillet. However, regular soap use strips the seasoning faster than necessary. For daily maintenance, hot water and a stiff brush are sufficient to clean cast iron without soap.
Flaxseed oil, vegetable shortening, and refined coconut oil are the most commonly recommended oils for seasoning cast iron due to their polymerization properties and high smoke points. Avoid extra virgin olive oil and butter for seasoning — their lower smoke points and additives do not polymerize well.
